1. Install Clickpost <> Shopify App
Clickpost will share your production login credentials.
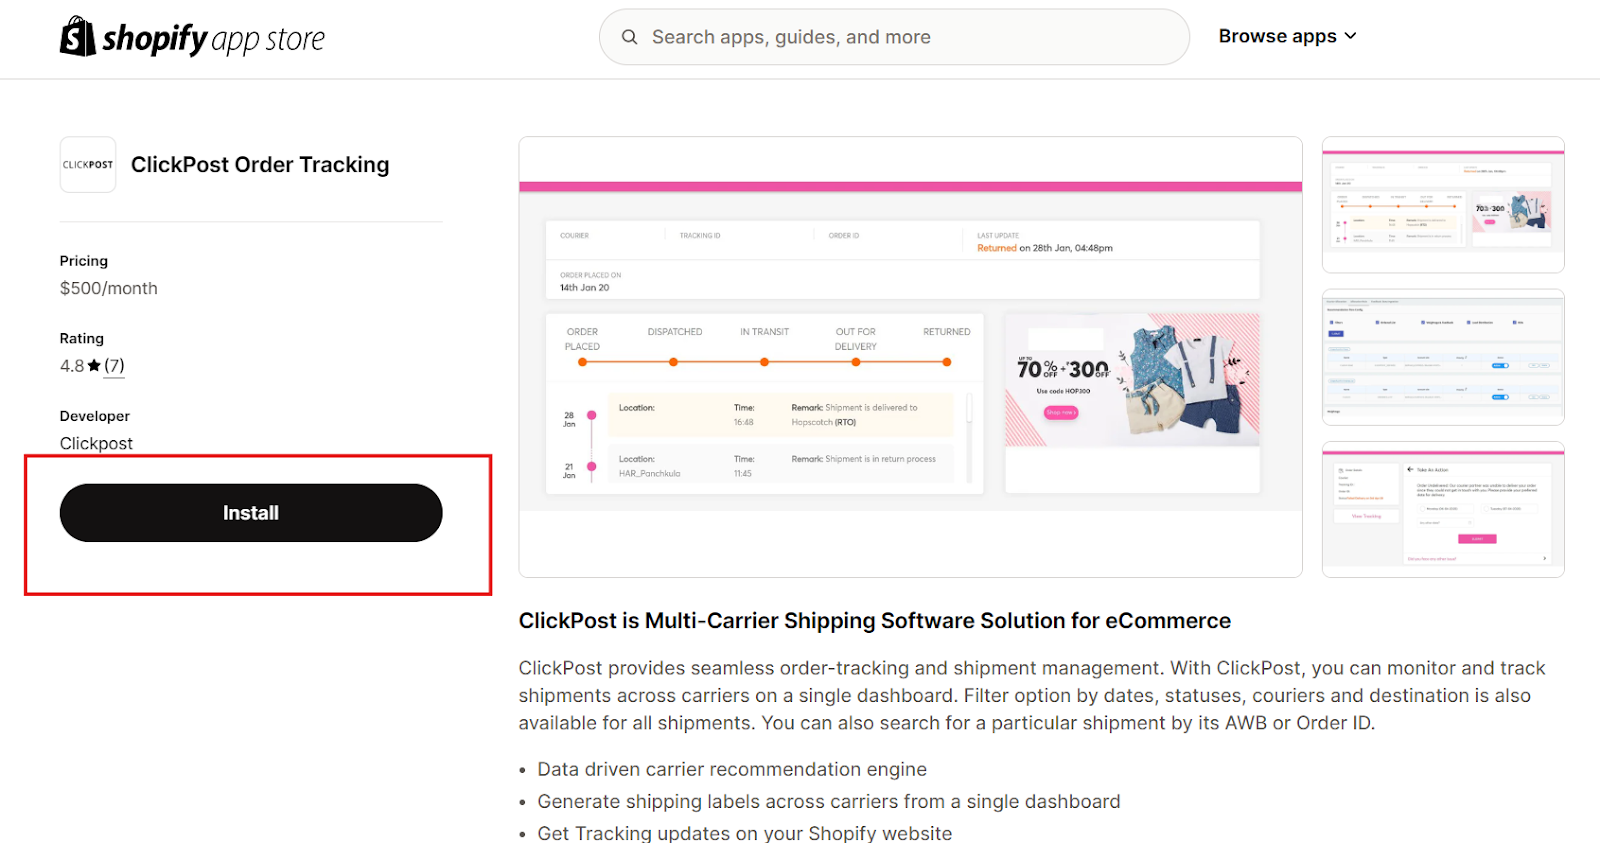
Log in to your Shopify account and open the Clickpost App URL:
ClickPost Order Tracking - Shopify App StoreClick Install.
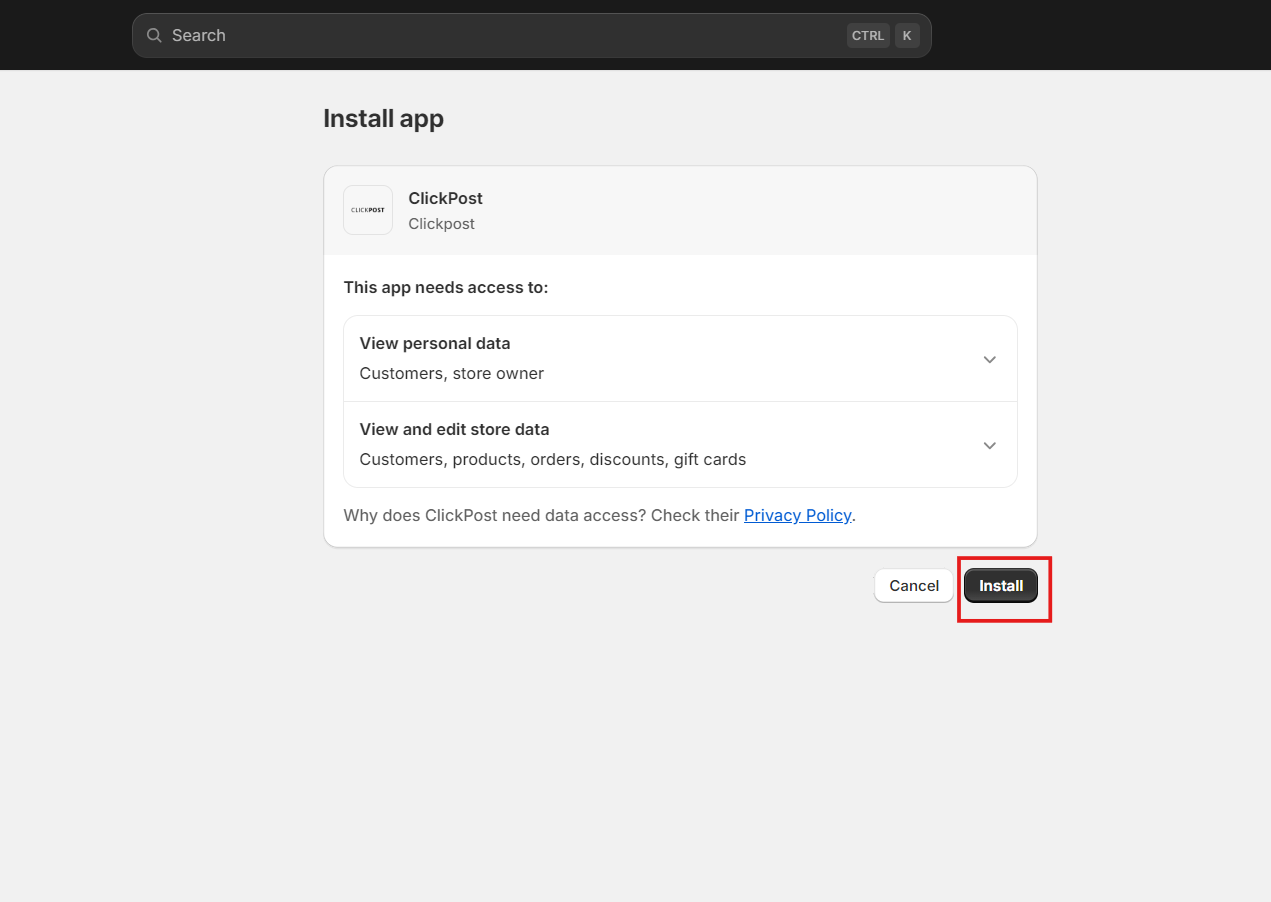
Confirm installation on your Shopify store.
You will be redirected to the Clickpost login page. Log in using the credentials provided by Clickpost.
After login, you’ll be redirected to the setup page. Enter your preferred Account Name and click Next.
Select Tracking and click Submit.


Your Shopify account is now connected to Clickpost.
2. Configure Warehouses
To add and map warehouses between Shopify and Clickpost, follow the steps below:
Step 1: Add Warehouse in Clickpost
Refer to the detailed guide here: How to Add a Warehouse on Clickpost Dashboard
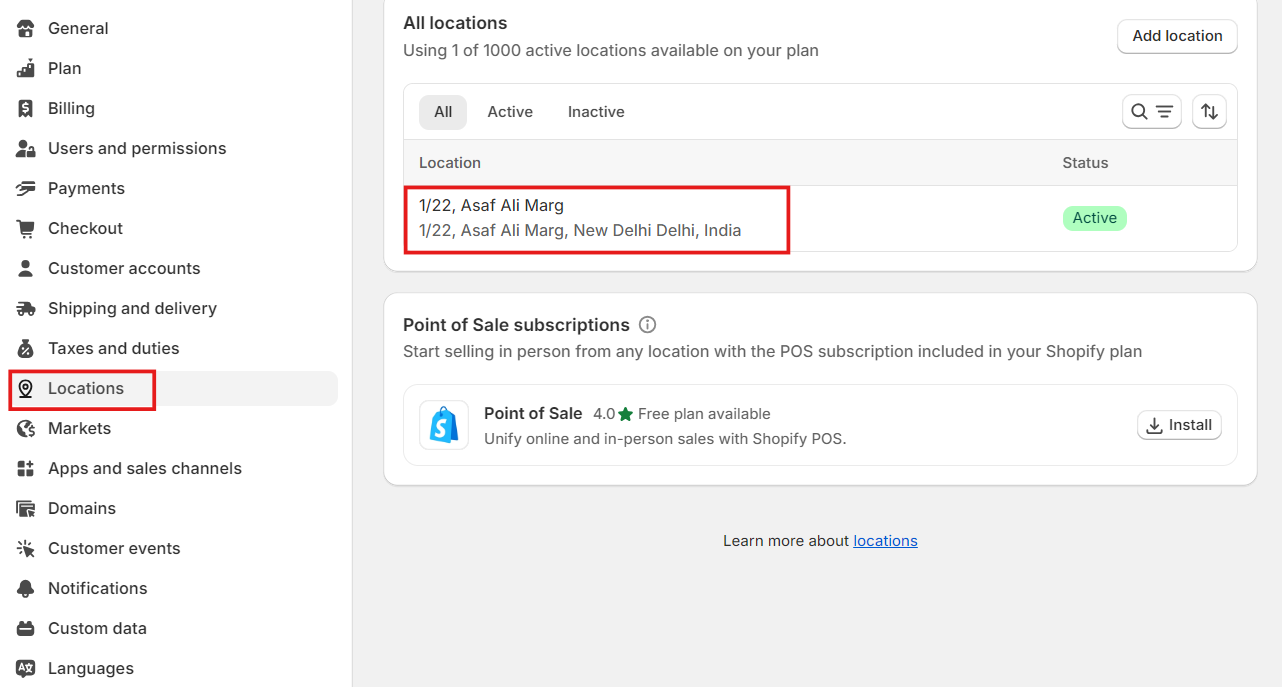
Step 2: Get Warehouse (Location) ID from Shopify
In your Shopify Admin Panel, go to Settings → Locations.
Select the warehouse you wish to map.
Copy the numeric Warehouse Code from the URL.
For detailed instructions, check this guide:
How to Find Location ID in Shopify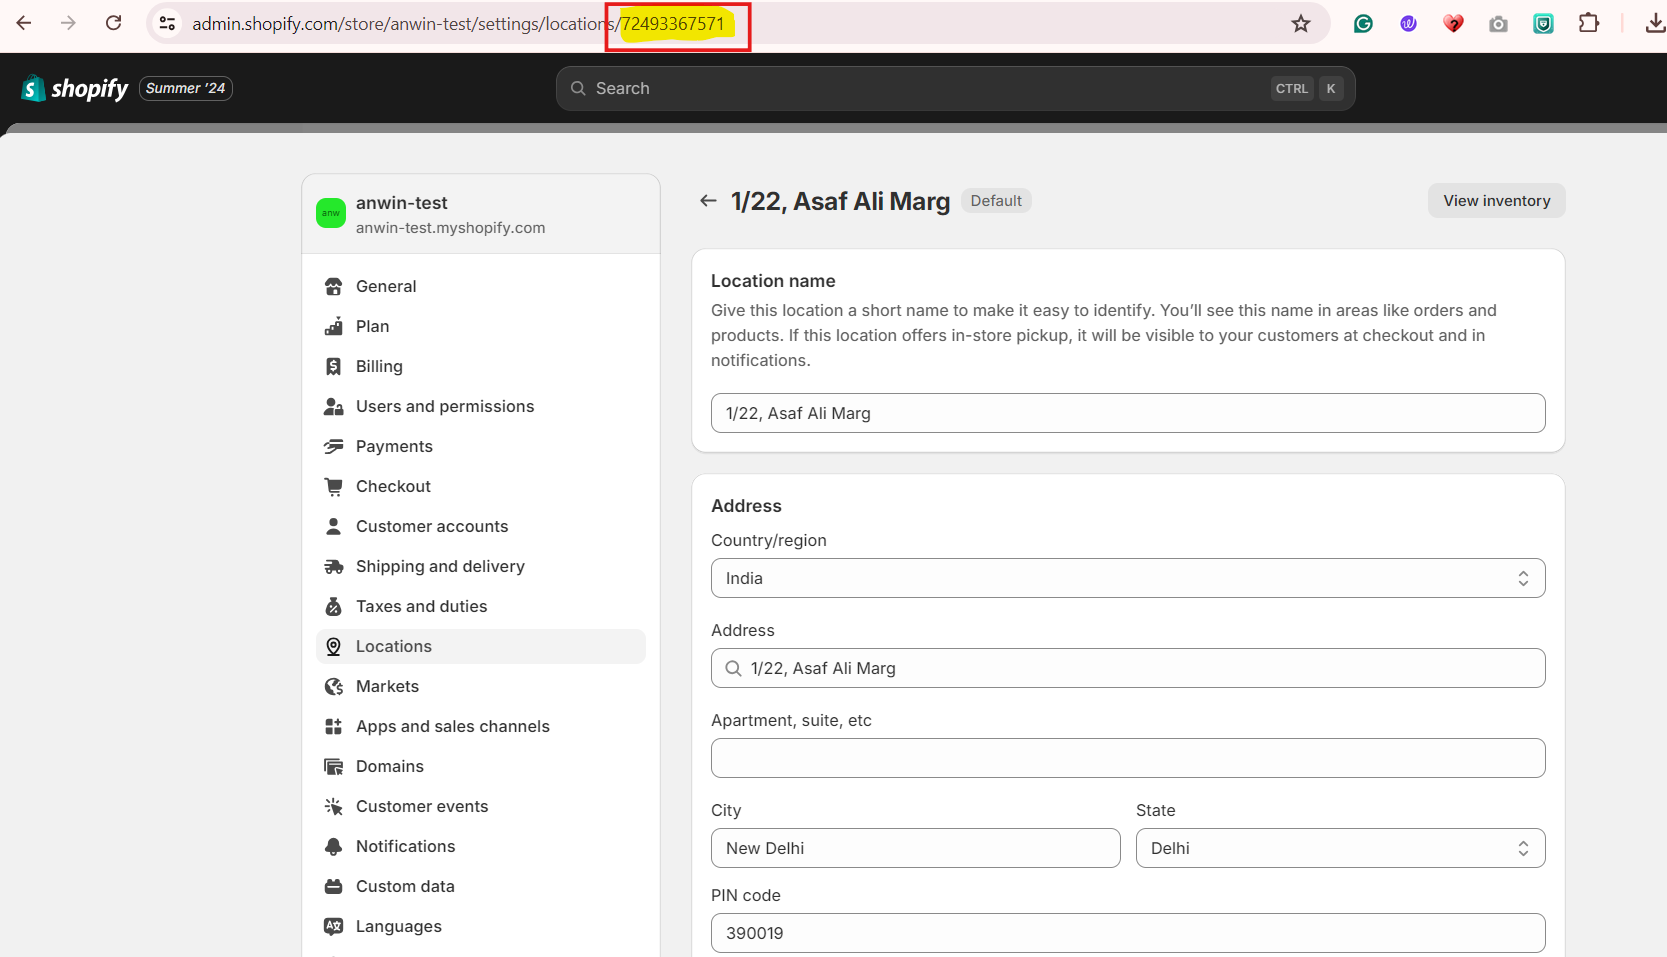
Step 3: Map Shopify Location ID on Clickpost
Use the following guide to complete the mapping:
How to Map Shopify Location ID on Clickpost
3. Map Courier Partners
This is the final step to enable order flow from Shopify to Clickpost.
Note: Wait at least 1 hour after warehouse setup before proceeding.
Follow the steps mentioned in this guide:
How to Map Courier Partners on Clickpost
You’ve successfully configured Shopify with Clickpost for Post Dispatch operations. In case of any challenges, feel free to reach out to support@clickpost.in.
Was this article helpful?
That’s Great!
Thank you for your feedback
Sorry! We couldn't be helpful
Thank you for your feedback
Feedback sent
We appreciate your effort and will try to fix the article
