Prerequisites to Setup Refund Automation:
The enterprise must have an active RazorpayX account.
Supported refund modes:
COD Orders: Payment Link, Manual
Prepaid Orders: Payment Link, Manual, and Direct Shopify Refunds
Steps to Initiate Refund Automation Setup
Step 1: Share the following details with ClickPost for integration
Account Number:
Merchant ID:
Secret Key:
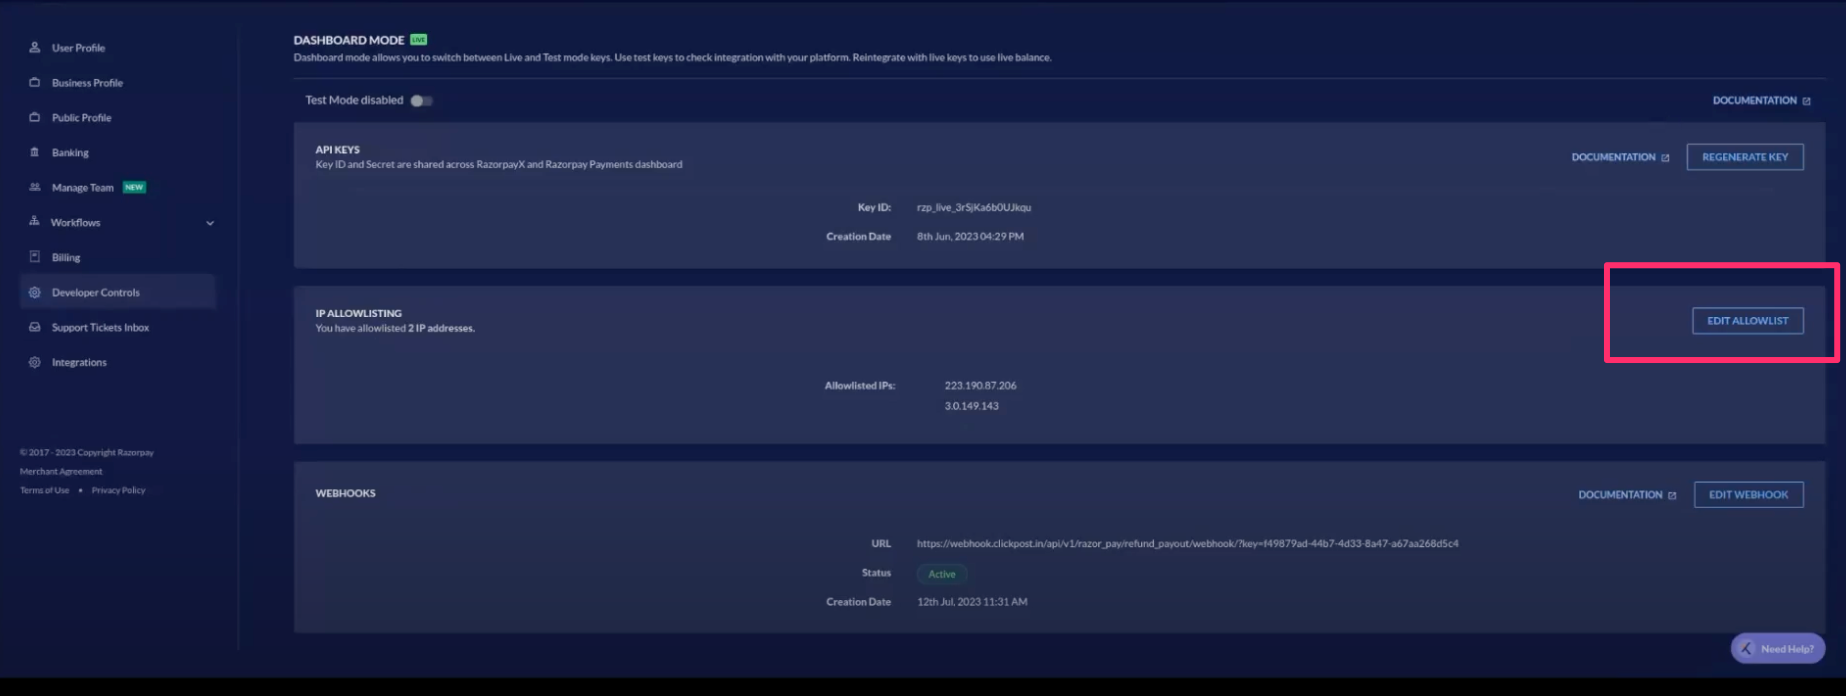
Step 2: Razorpay Webhook Setup & IP Whitelisting
Log in to Razorpay and go to My Account → Settings

2. Click on Developer Controls
3. Navigate to Edit Webhooks

Step 3: Add Webhook Endpoint
Enter the endpoint URL shared by the Onboarding / Support team
Enable the toggle for “Webhook Active”
Reach out to support@clickpost.in to get the webhook URL required to add here
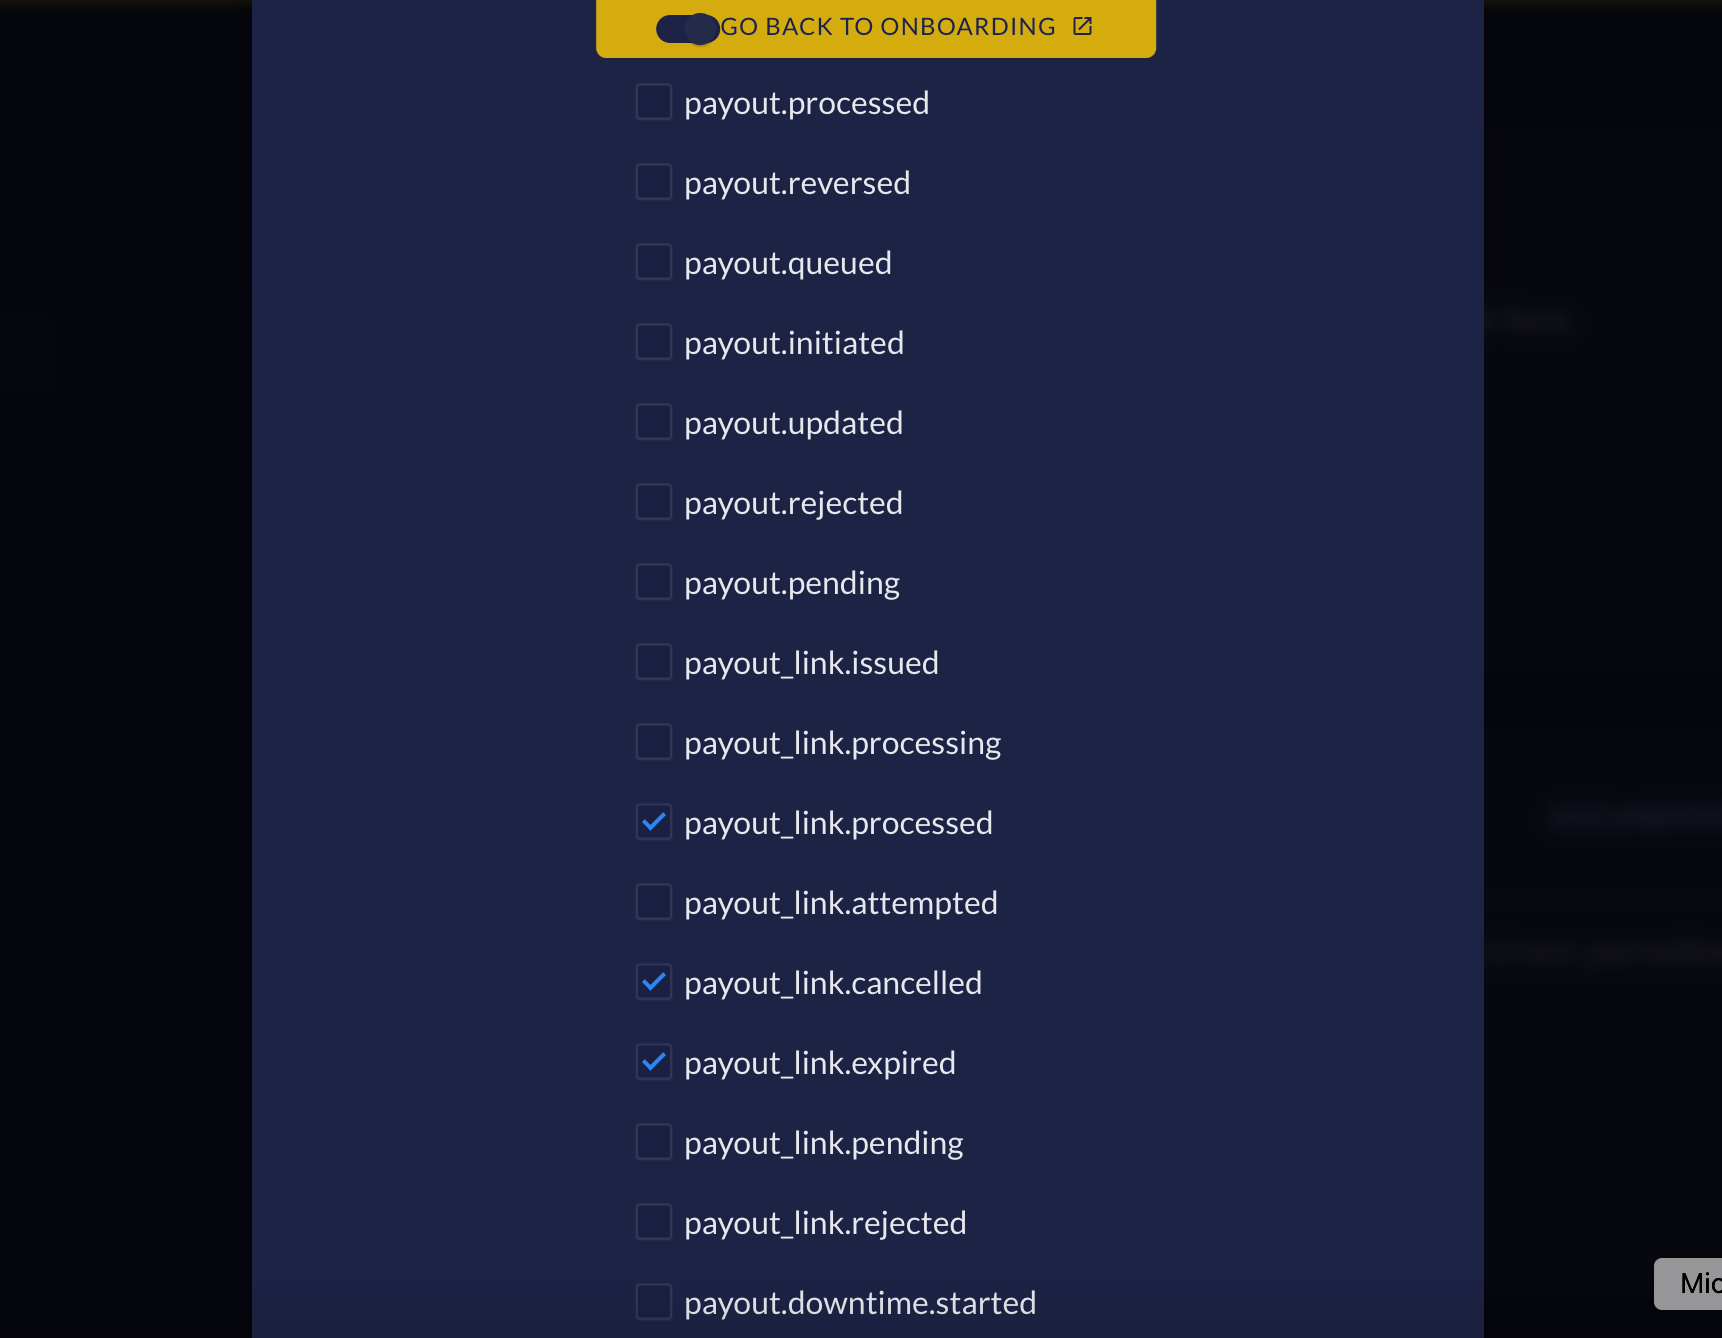
Step 4: Enable the following webhook events and save
payout_link.processedpayout_link.expiredpayout_link.cancelled
Step 5: IP Whitelisting
In the Edit Allowlist section, whitelist the following ClickPost IPs:
3.111.124.243
13.232.162.80
3.0.149.143
34.100.227.94
Notes
Refund via Payout Link (RazorpayX):
A payout link for the specified amount is generated and shared with the customer.Refund to Original Payment Mode (Prepaid via Shopify):
Refund is processed directly to the customer’s original payment method.Manual Refund via Other Modes:
Used when the enterprise prefers to process refunds through a platform outside ClickPost.
Razorpay Account Configuration Tutorial:
https://drive.google.com/file/d/1KTCbw_zudNmjqR1HM77CVnowu8P3fQzn/view
Was this article helpful?
That’s Great!
Thank you for your feedback
Sorry! We couldn't be helpful
Thank you for your feedback
Feedback sent
We appreciate your effort and will try to fix the article