Problem statement: For an Enterprise using Returns UI of Clickpost, approving/Denying return requests manually from the dashboard is a time-consuming task.
Solution: To cater the above use case, Clickpost has introduced auto approval/Denying functionality based on the return reasons.
Here are the steps involved to enable the feature on Clickpost:
STEP 1: Go to return config tab under settings section of the dashboard.
https://dashboard.clickpost.ai/settings/return-config/reasons
STEP 2: Click on the dropdwon corresponding to the configured reason. It will show 3 options:
-auto approval: Return request will be automatically approved for the reason.
-auto rejection: Return request will be automatically approved for the reason.
-Manual: Admin need to approve/deny the request manually from Dashboard
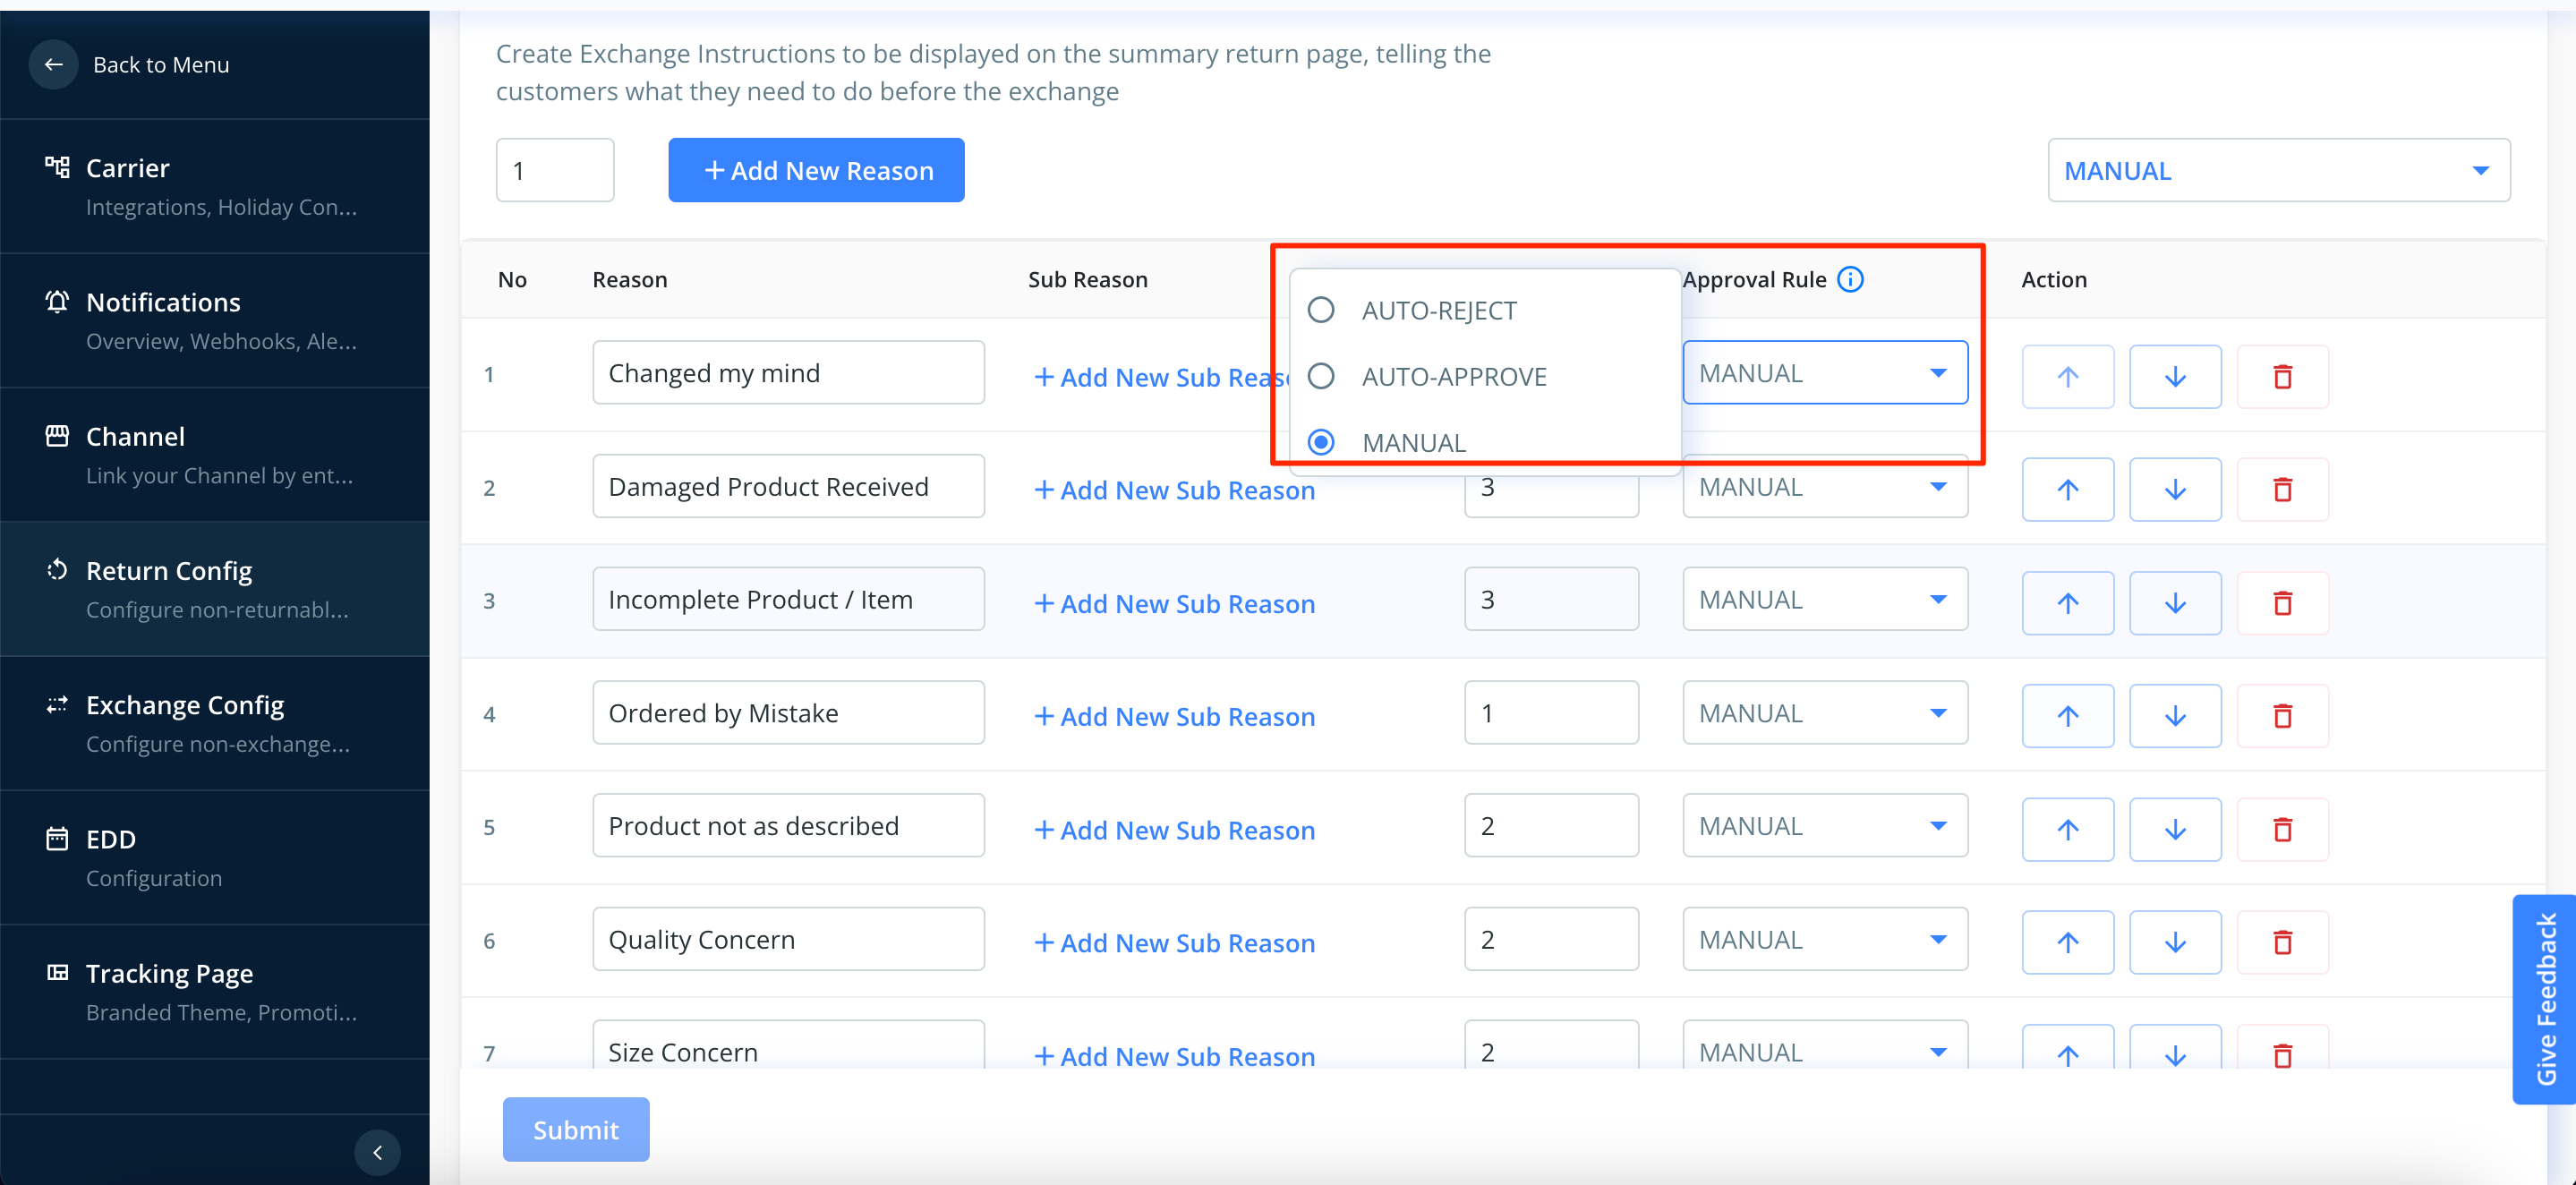
STEP 3: Select the approval rule for all the reasons and Click on Submit.
The approval rules will be applied to all the new return requests.
Was this article helpful?
That’s Great!
Thank you for your feedback
Sorry! We couldn't be helpful
Thank you for your feedback
Feedback sent
We appreciate your effort and will try to fix the article