Clickpost offers flexibility for label customization from the dashboard. In case a brand does not wish to use the default courier-provided labels, they can either:
Use Clickpost’s default label template, or
Upload and configure their own custom HTML label template
For custom HTML templates, Clickpost supports dynamic tags that populate real-time order details like: AWB number, Drop/pickup info, Product-level information, etc

These tags can be easily mapped and inserted into the HTML format, enabling a fully branded and functional label layout.
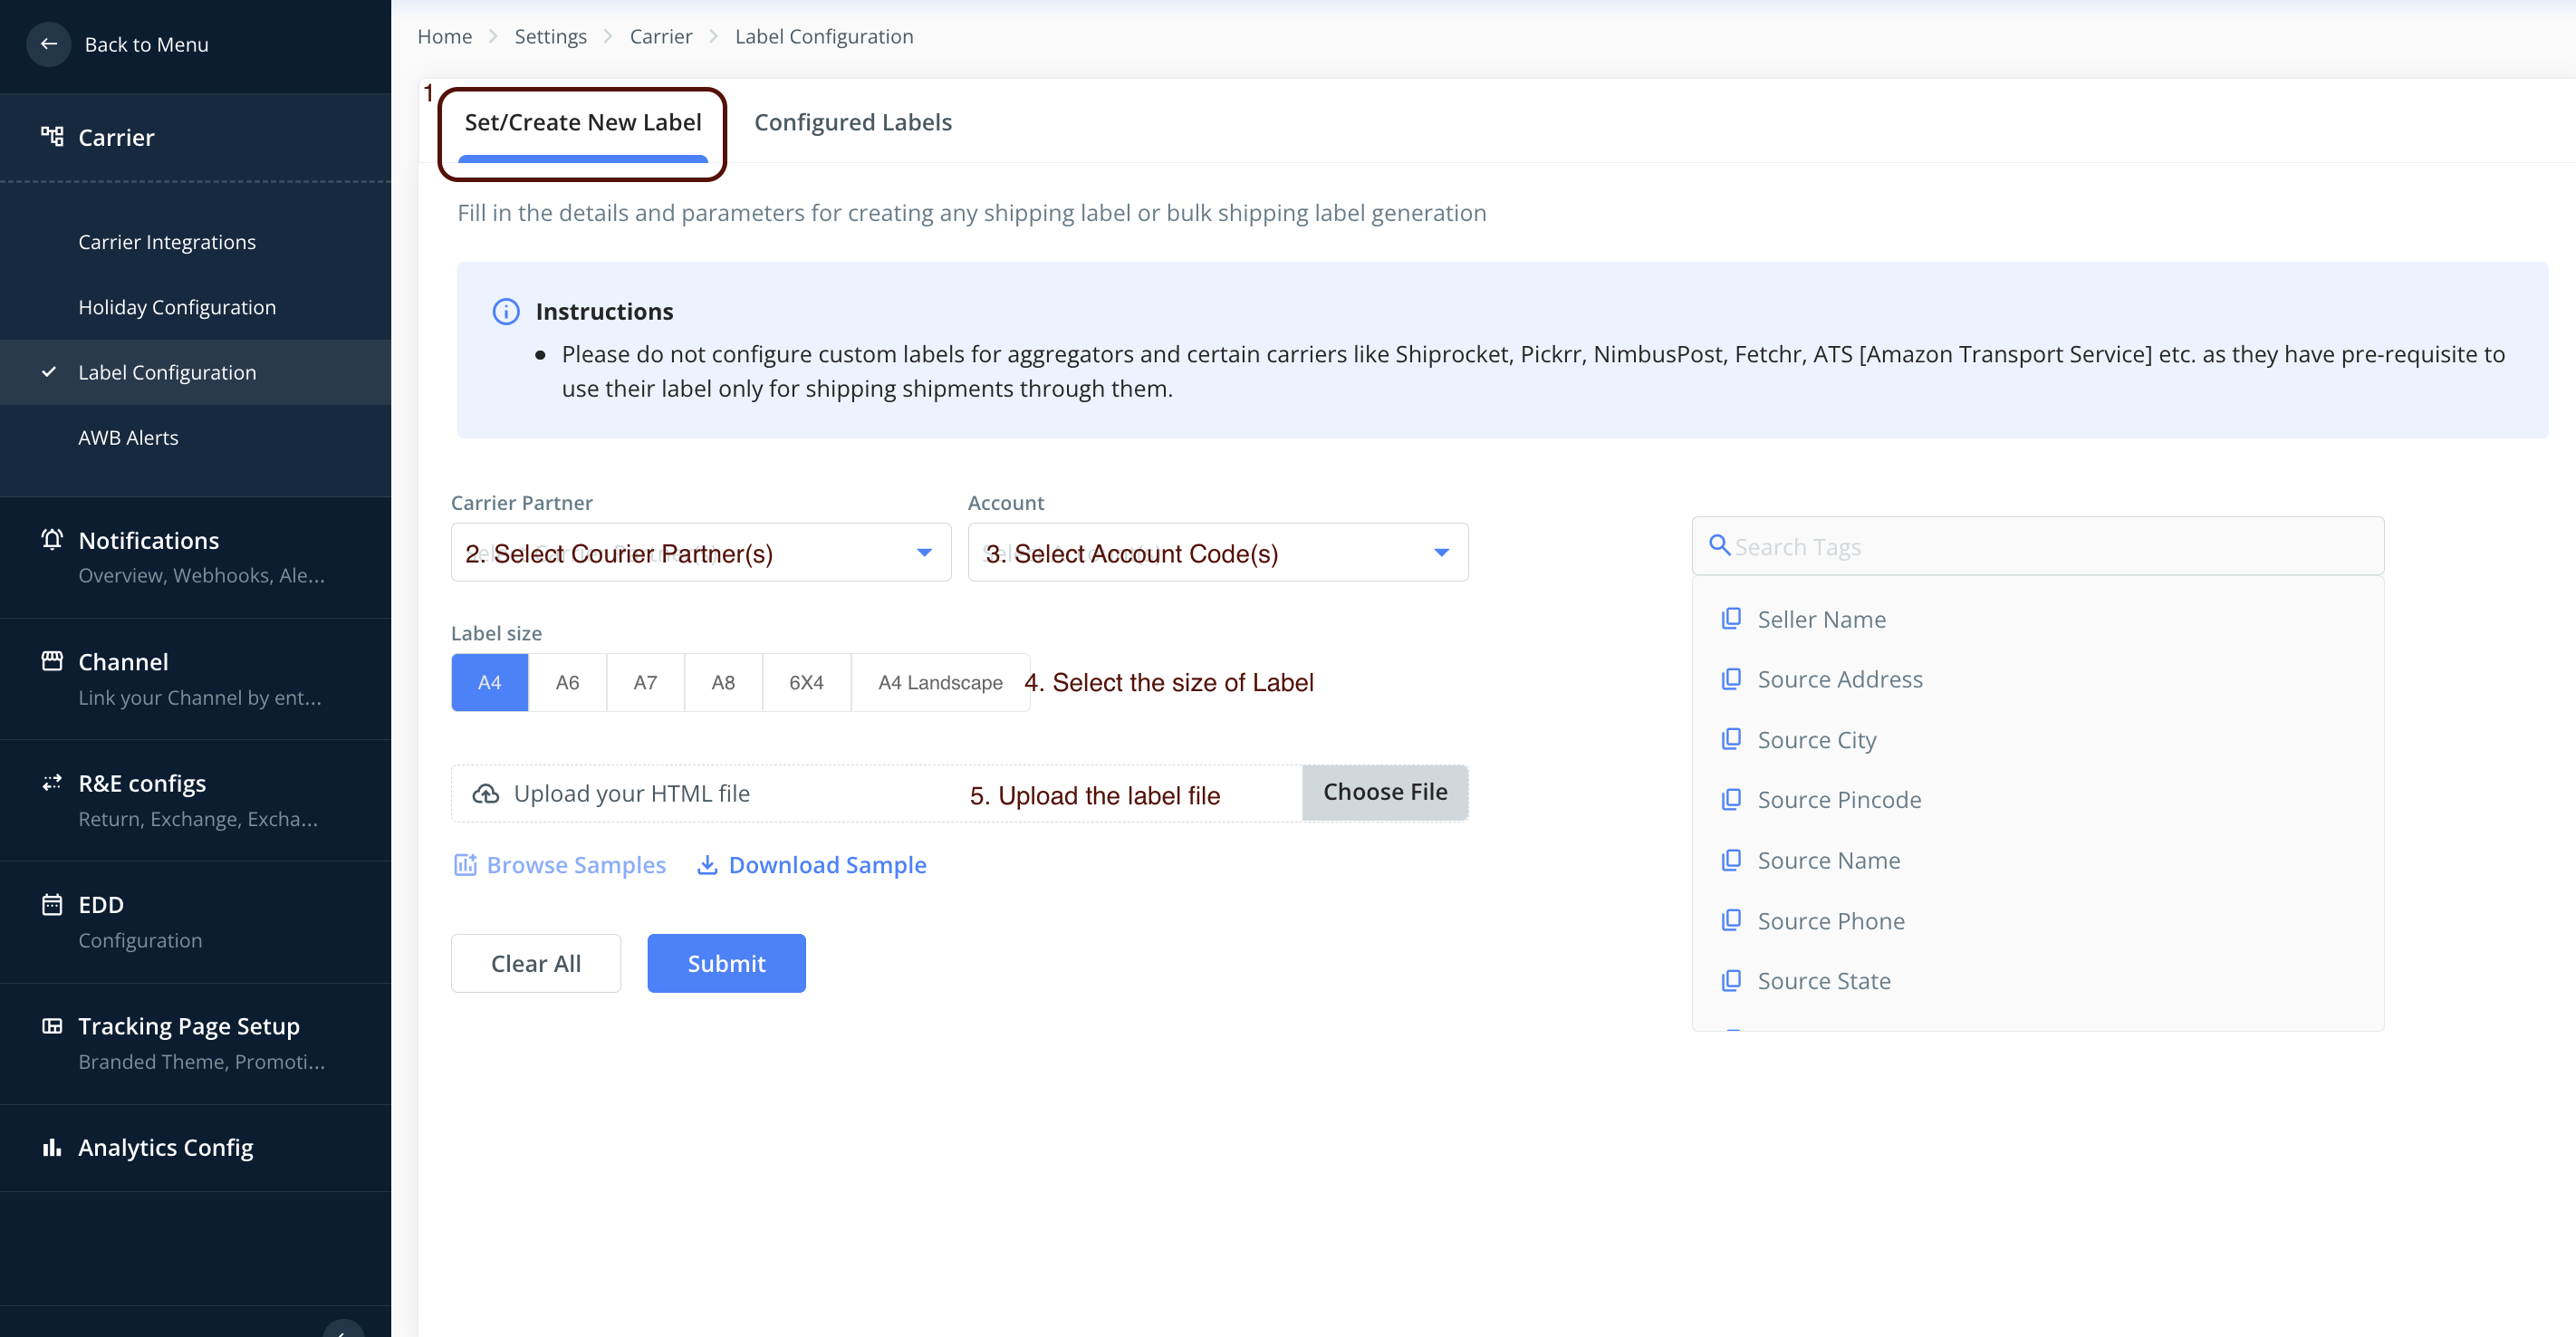
To upload and configure a label (custom or Clickpost default), follow these steps:
Navigation: Menu → Settings → Carrier → Label Configuration
Steps:
Click Set/Create New Label
Select courier partners for which you want to apply the label
Choose account codes corresponding to each courier
Select the label size
Upload the HTML file (you can also download a sample template for the Clickpost default label)
- Click Submit
- Once uploaded, you can preview all configured labels under the Configured Labels section.
- Once uploaded, you can preview all configured labels under the Configured Labels section.

- Click “Edit” to update the existing label template size or upload a new one for the selected account code.

Was this article helpful?
That’s Great!
Thank you for your feedback
Sorry! We couldn't be helpful
Thank you for your feedback
Feedback sent
We appreciate your effort and will try to fix the article