To add a new Vendor Code or view existing ones, follow the steps below:
Navigation Path
Log in to the Clickpost Dashboard.
Go to:
Settings → Carrier → Carrier Integrations → [Courier Name] → Select Account Code → Vendor Code

Adding a New Vendor Code
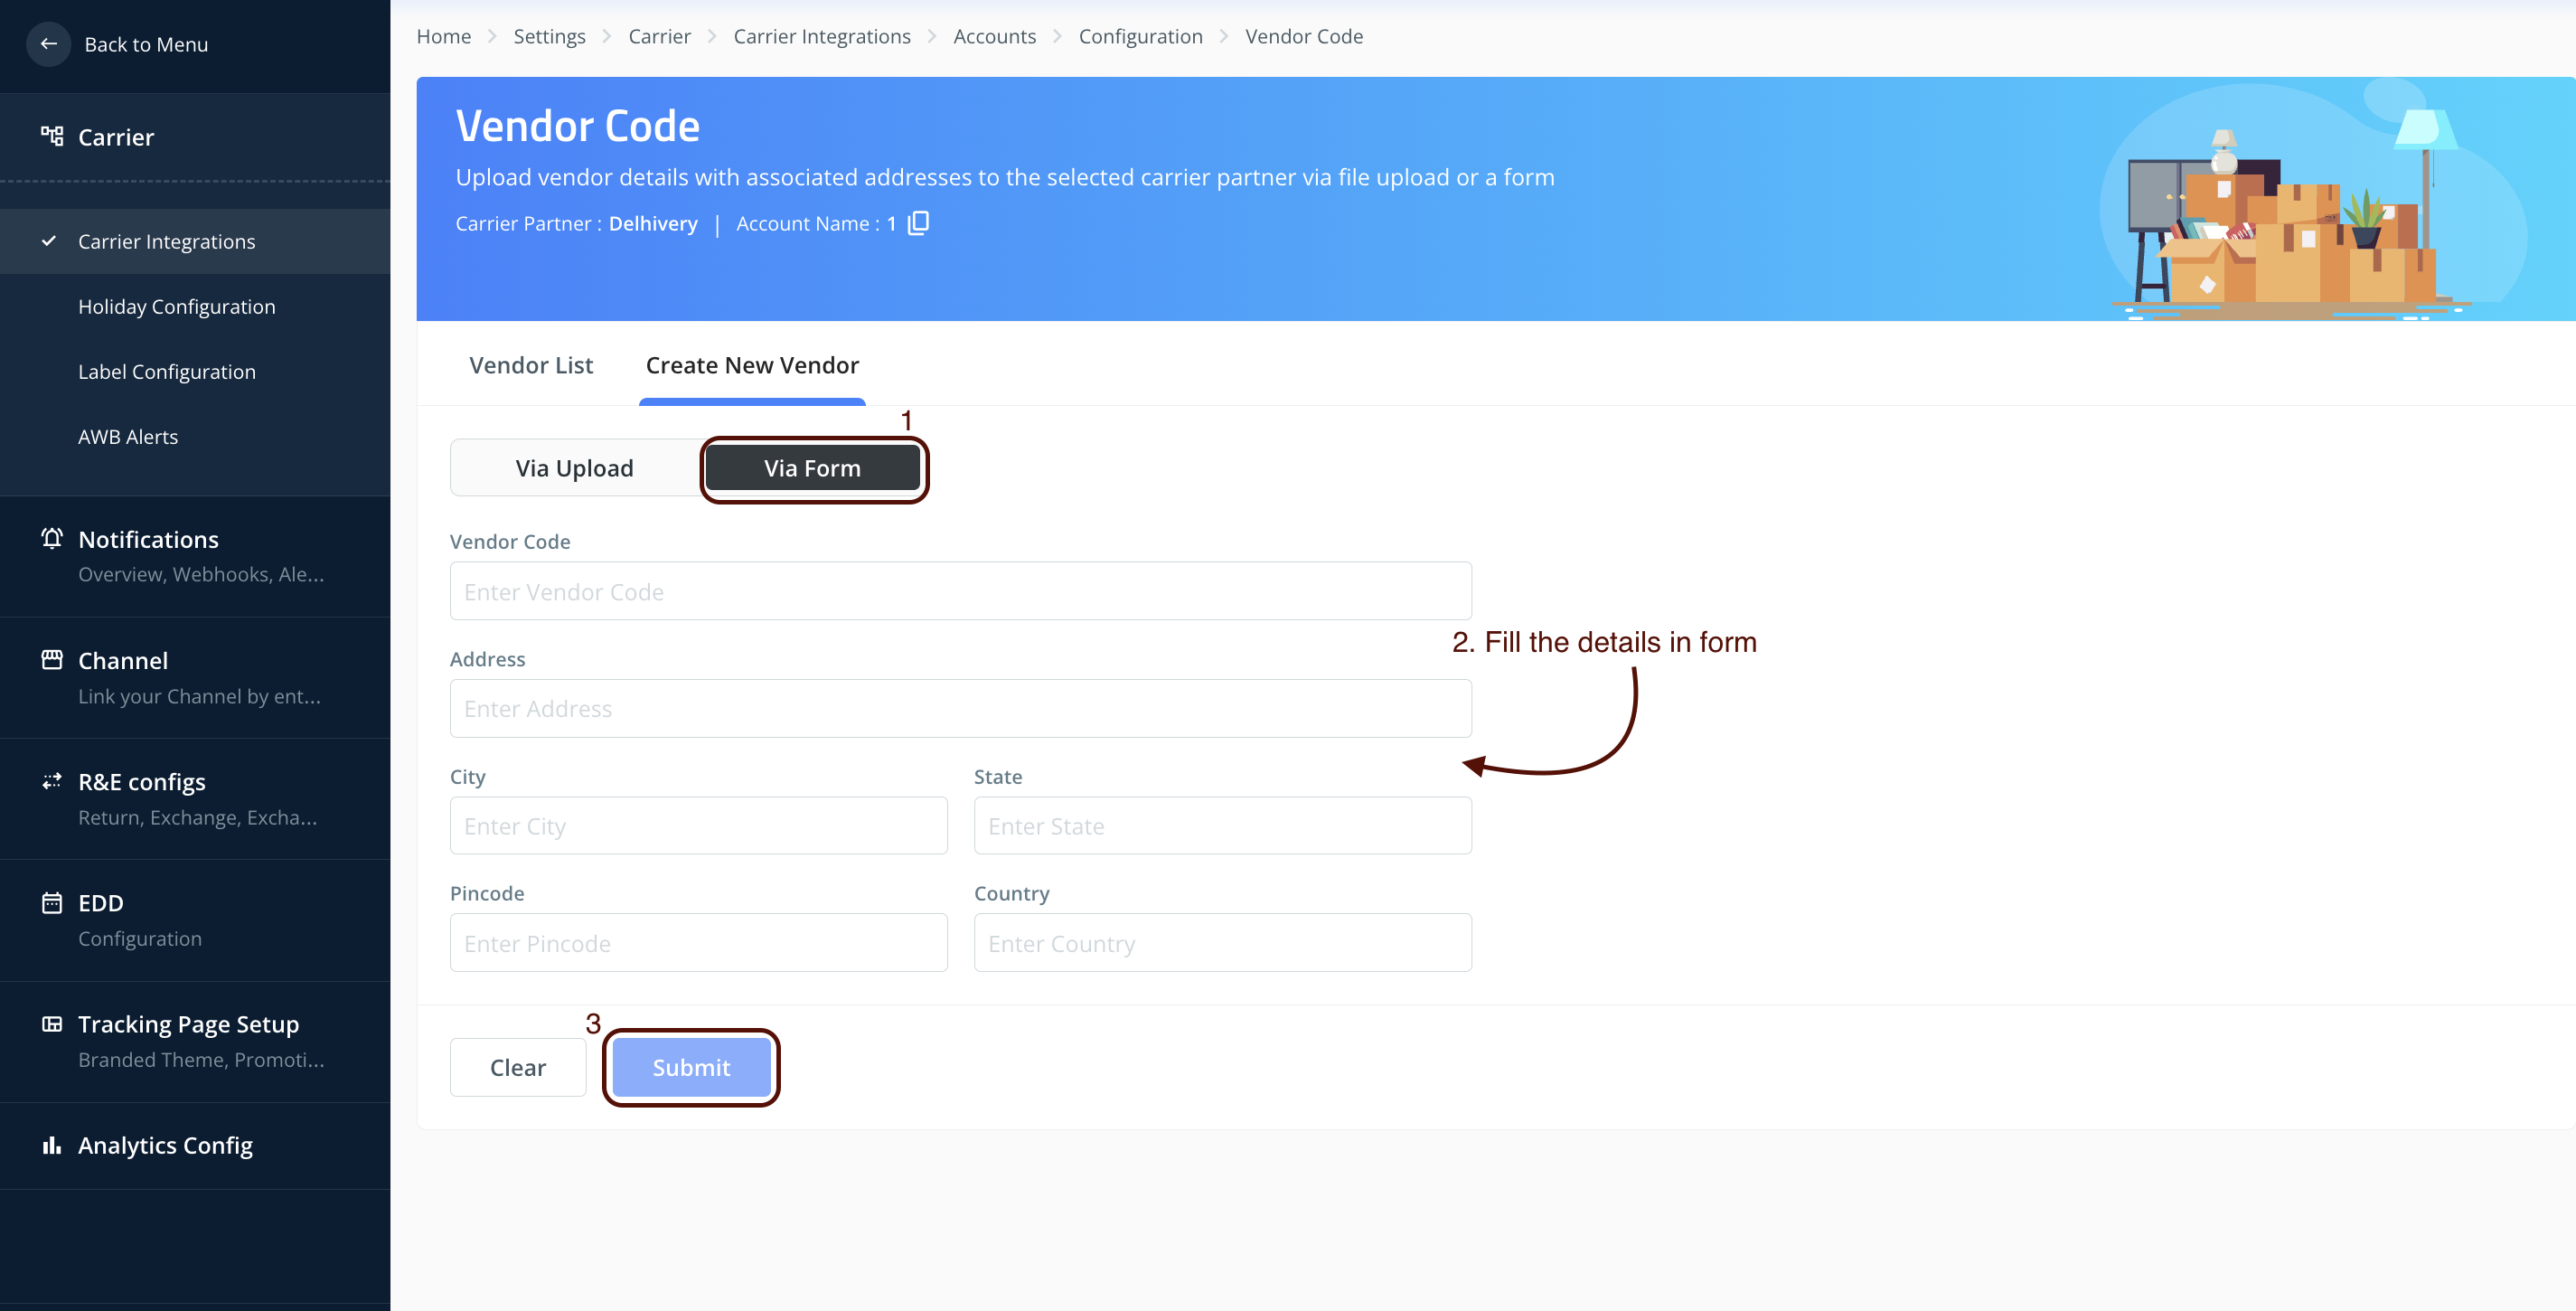
Click on Create New Vendor

You can add Vendor Codes in two ways:
1. Via File Upload
Download the sample file provided.
Fill in all mandatory details: Vendor Code, Address, City, State, Pincode, Country
Save the file as CSV and upload it.
Once uploaded, you can view the upload history below.

2. Via Form
Toggle to the Form option.
Enter the required details in each field.
Click Submit to save.
Viewing and Managing Vendor Codes
Once Vendor Codes are added, you can:
View: Check all mappings under the Vendor List.
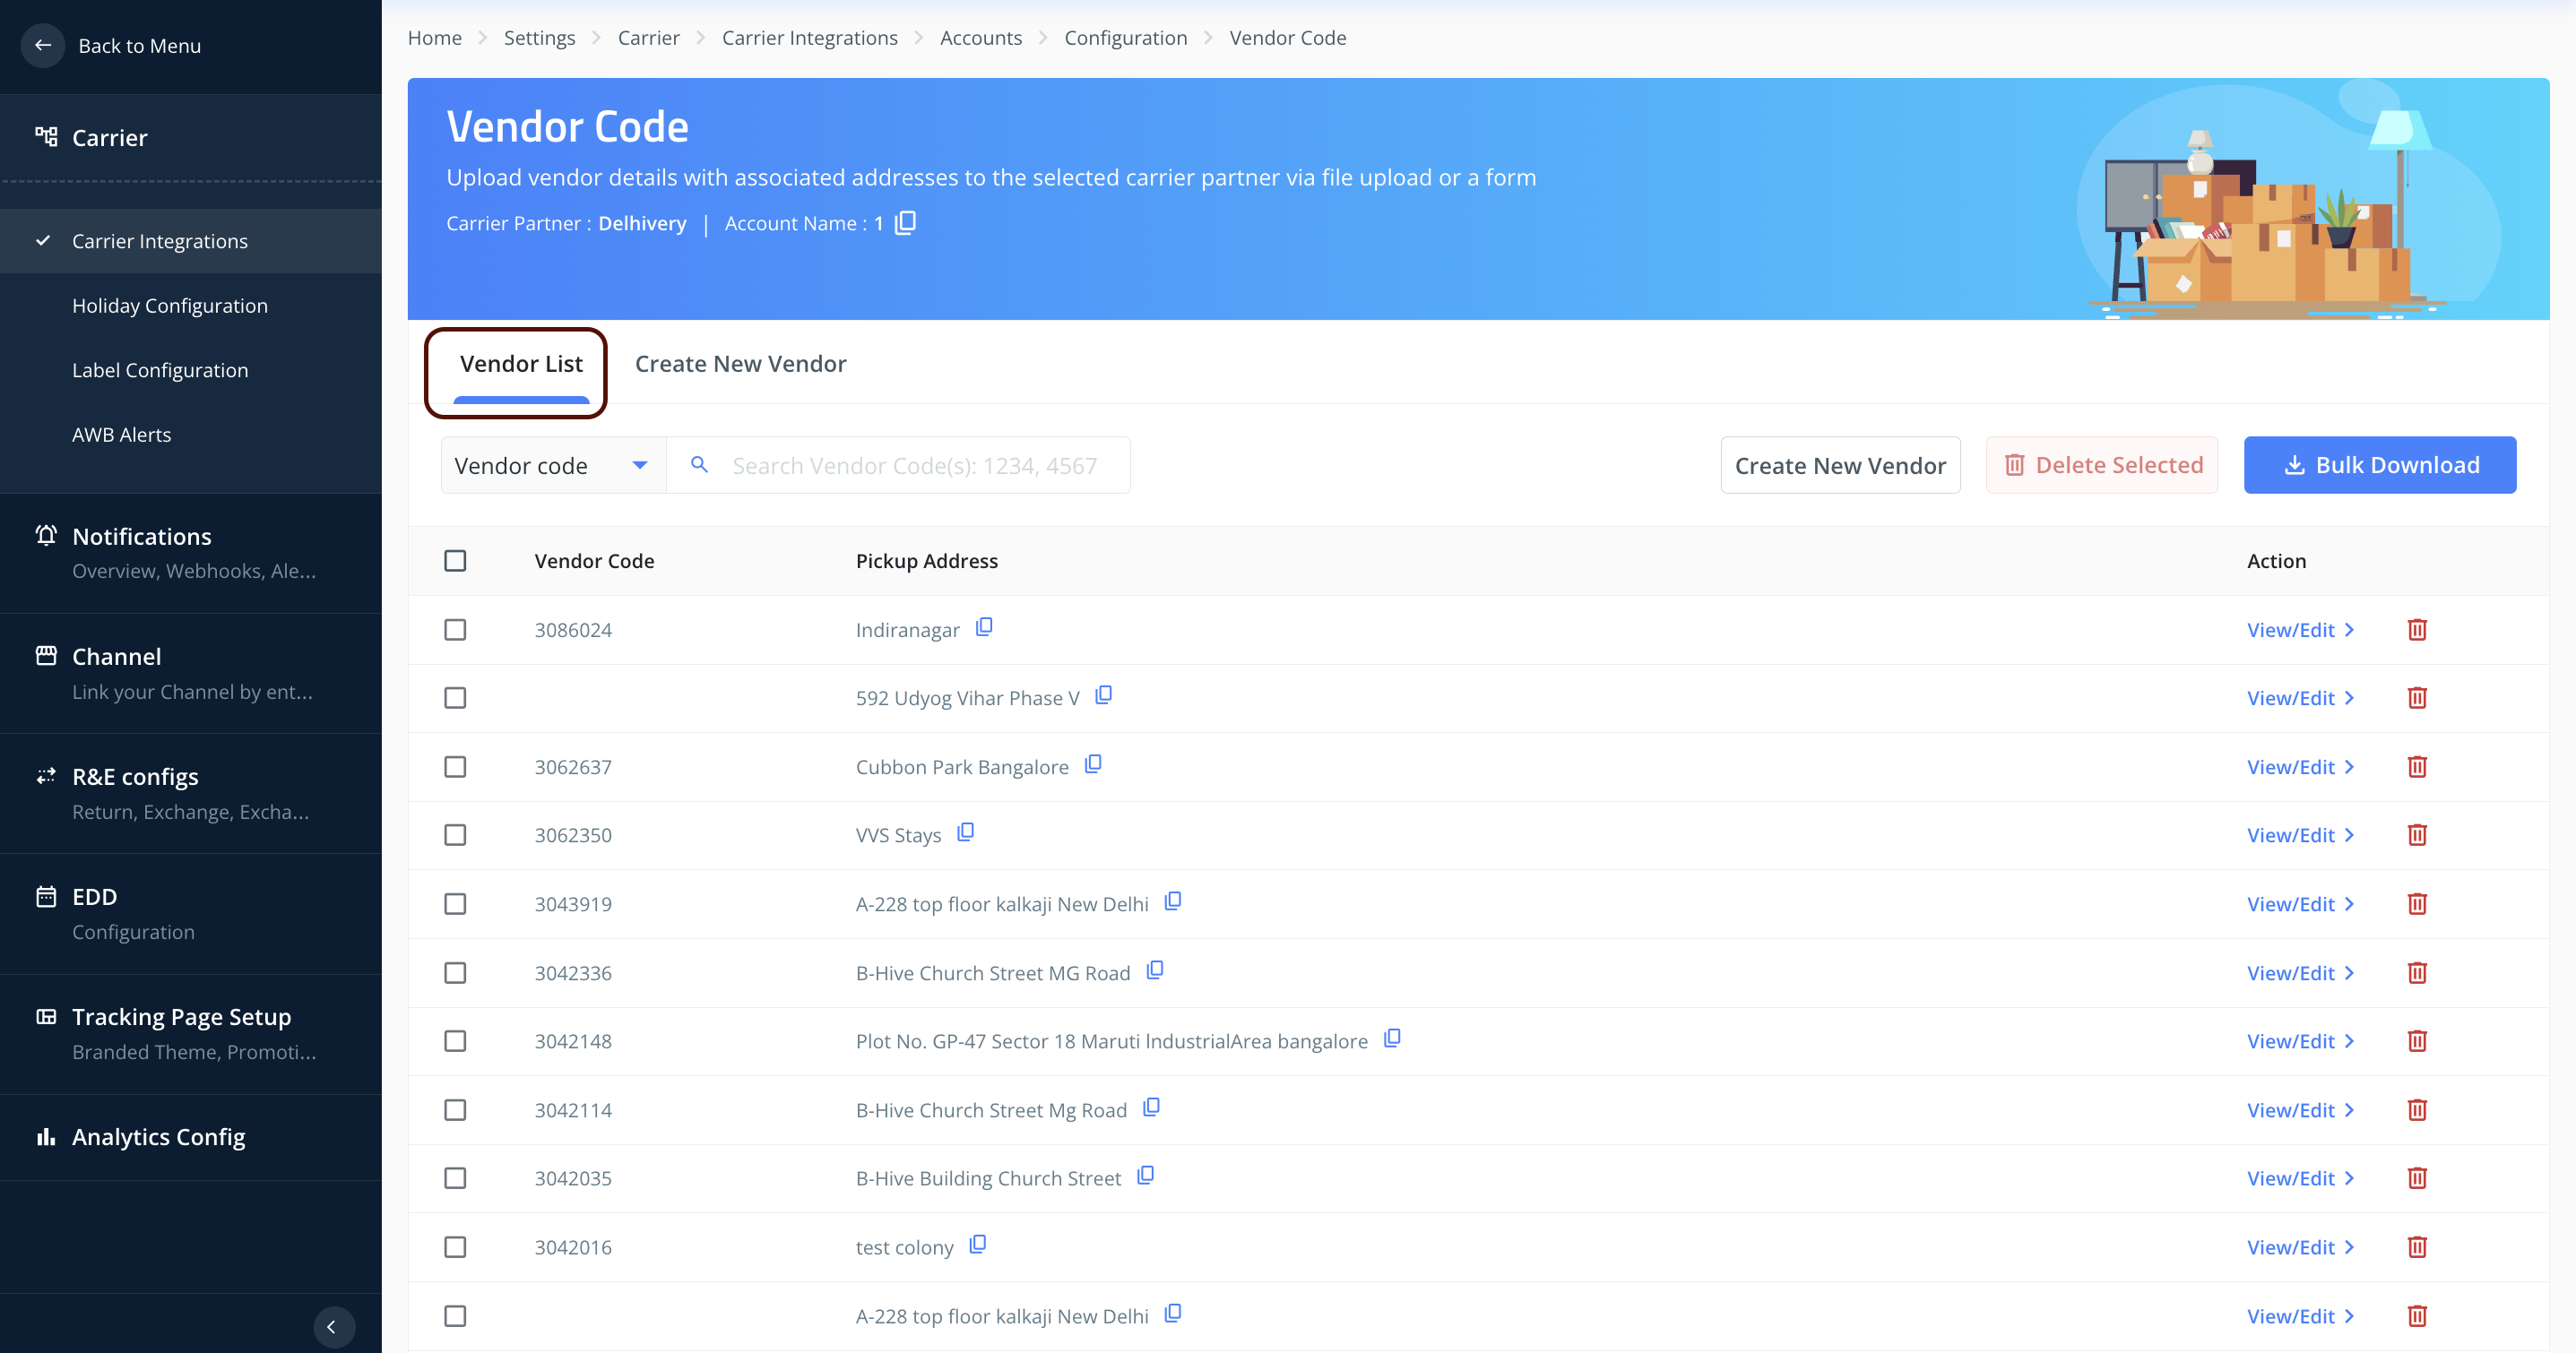
Search: Use the dropdown to search by Vendor Code or Address.

Edit: Click the edit option on the right to update a Vendor Code against an address.

Delete: Remove a Vendor Code entry if no longer required.

Important Note
Ensure that the pickup address passed in the Clickpost API is an exact match with the one mapped internally (no character-level differences, extra spaces, or mismatches).
Was this article helpful?
That’s Great!
Thank you for your feedback
Sorry! We couldn't be helpful
Thank you for your feedback
Feedback sent
We appreciate your effort and will try to fix the article