The Status Counters on the ClickPost dashboard represent groups of shipment statuses organized into logical buckets (e.g., Delivered, In Transit, RTO Initiated, etc.).
These counters can be customized to align with your organization’s tracking and reporting requirements.

Steps to Configure Status Counters
Navigate to the ClickPost Dashboard.
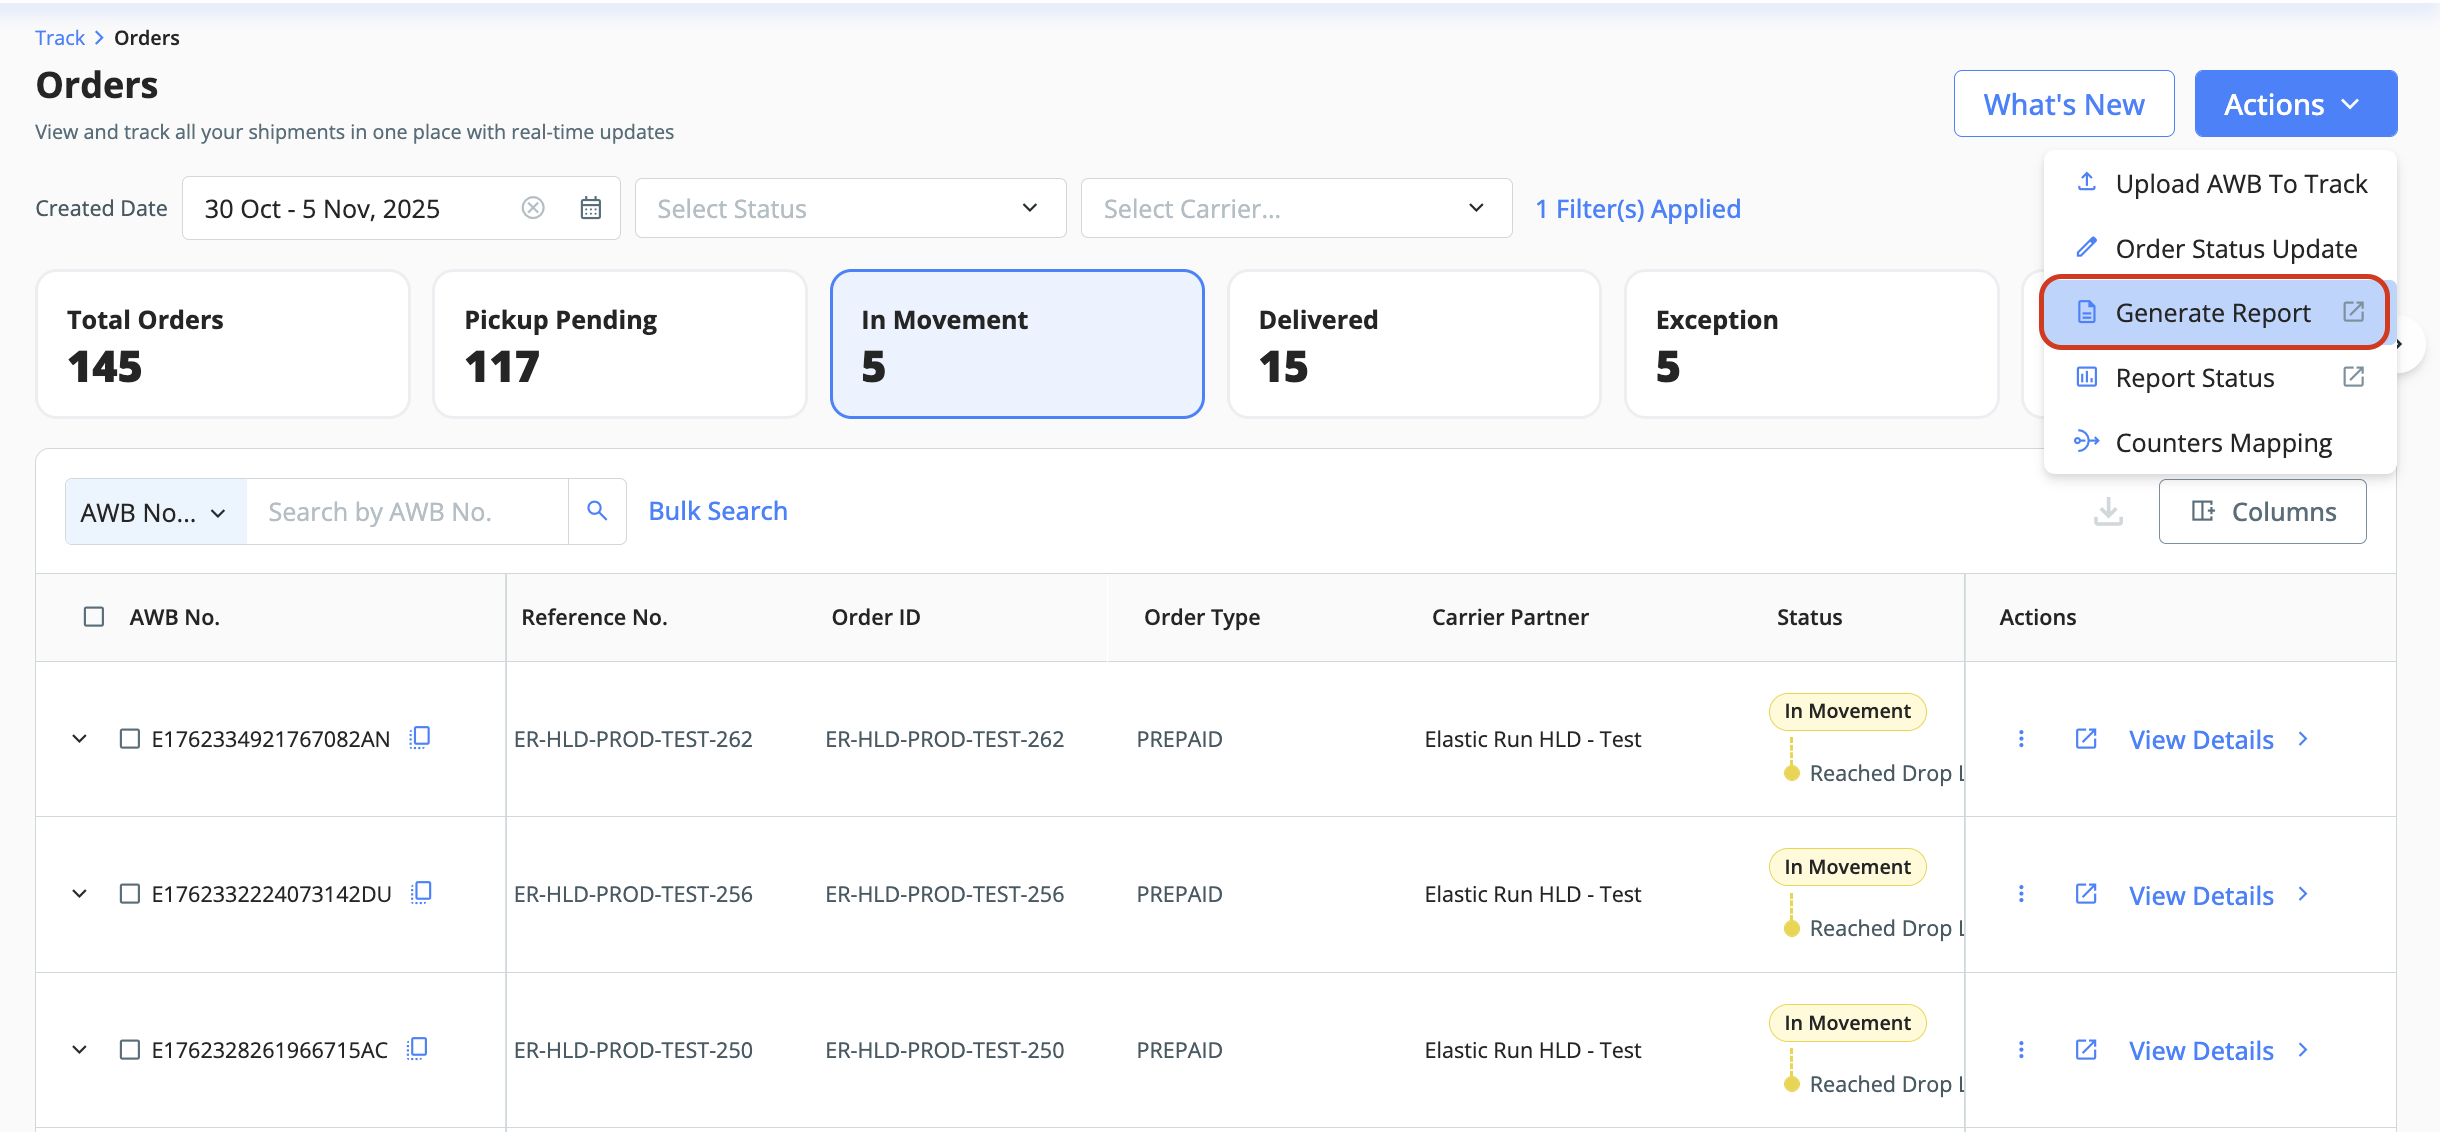
Click the “Actions” button on the top-left corner.
Select “Counters Mapping” from the dropdown menu.

Customizing Existing Counters
Click the Edit icon beside a counter name to rename it.
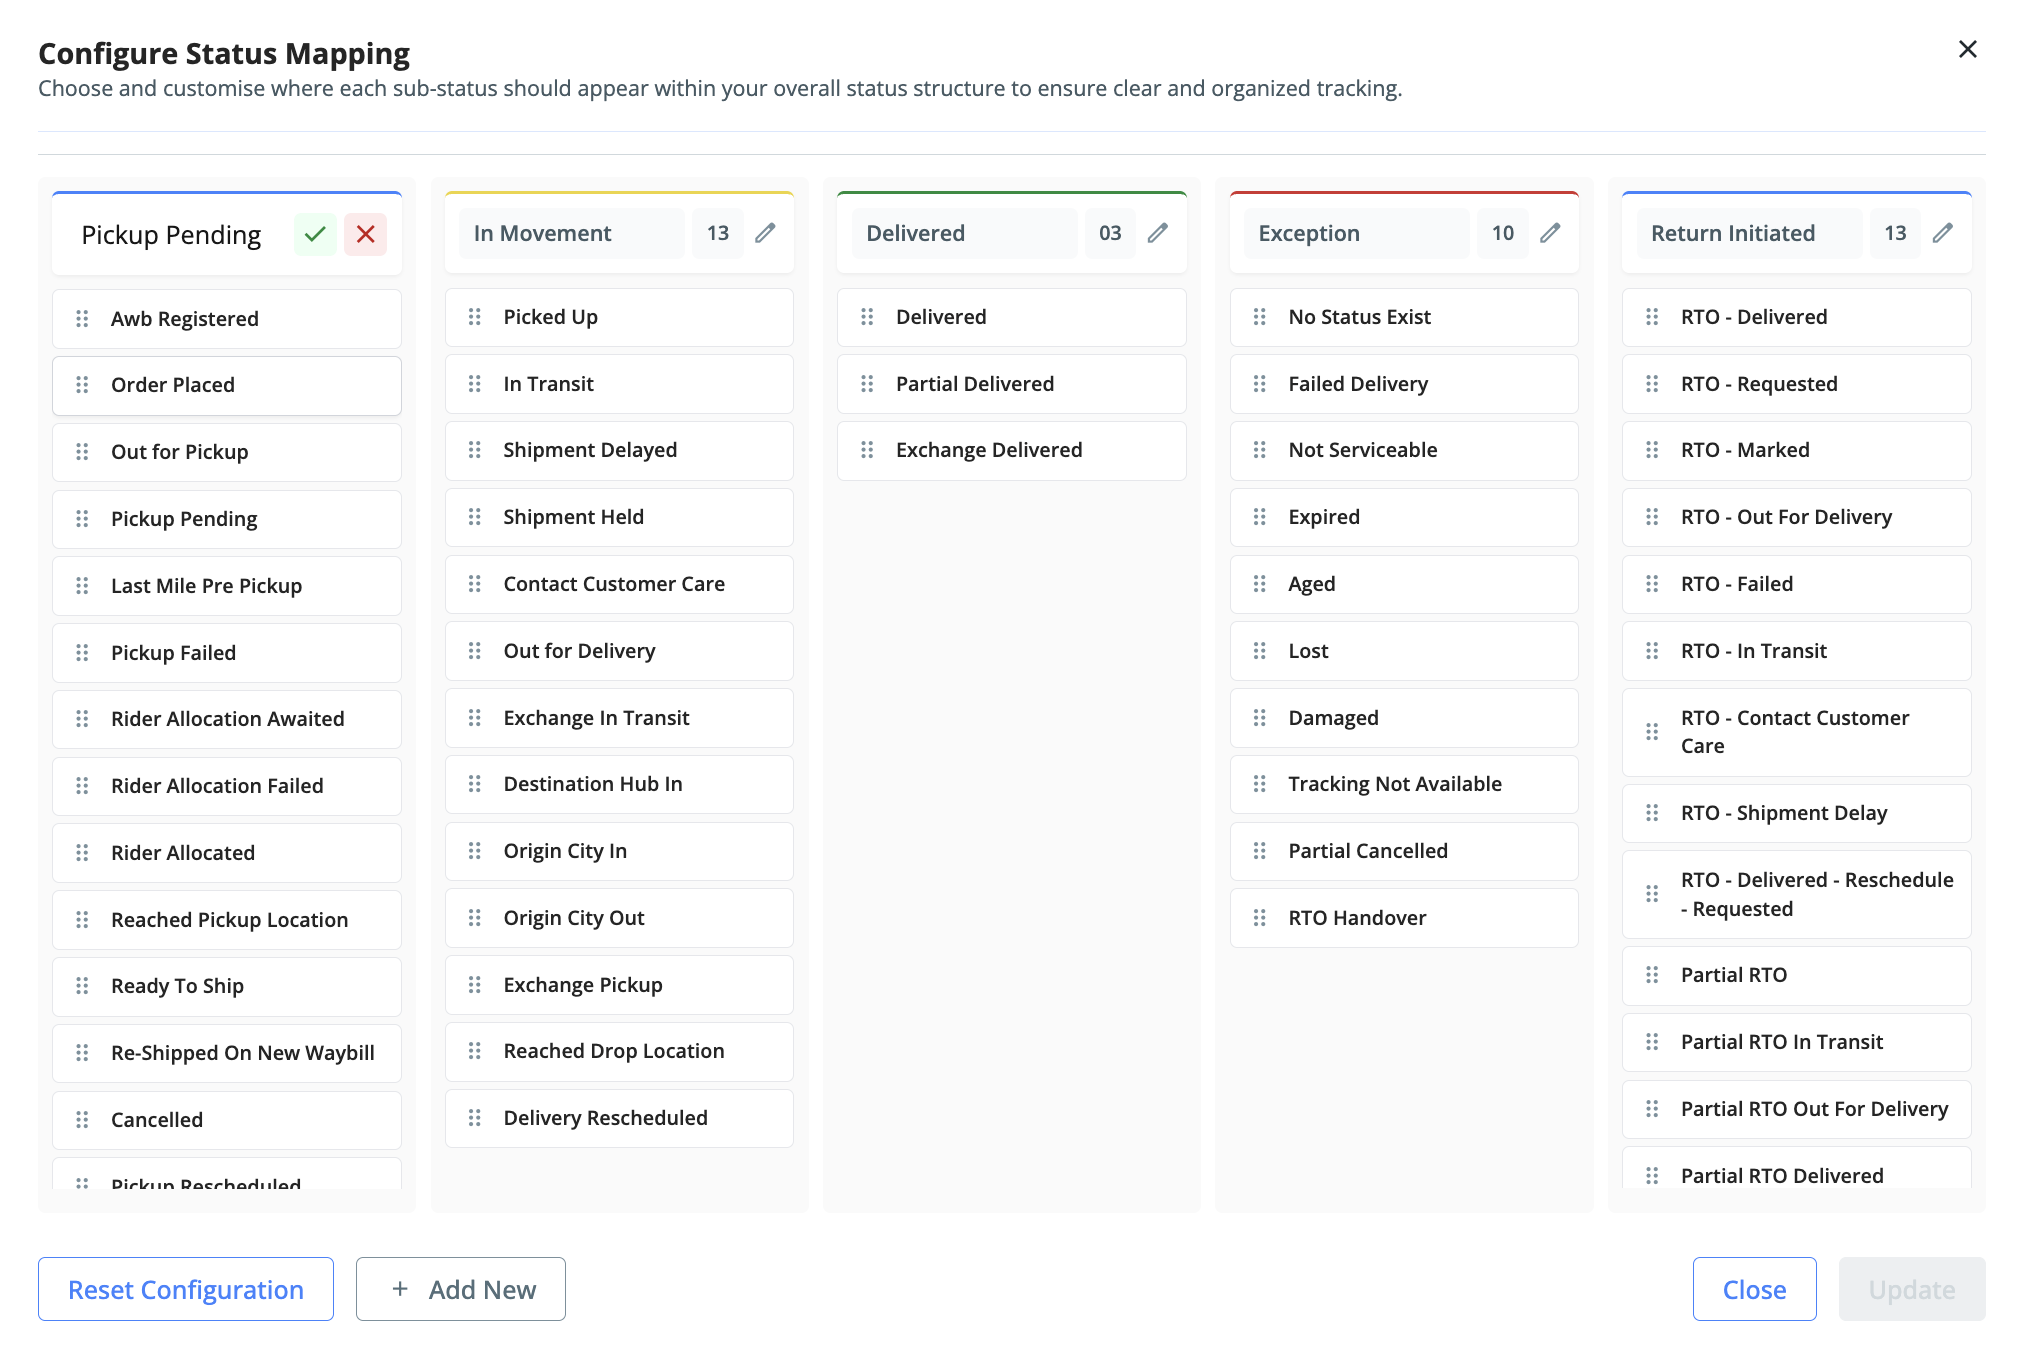
To regroup statuses, simply drag and drop individual statuses into the counter bucket where you’d like them to appear.

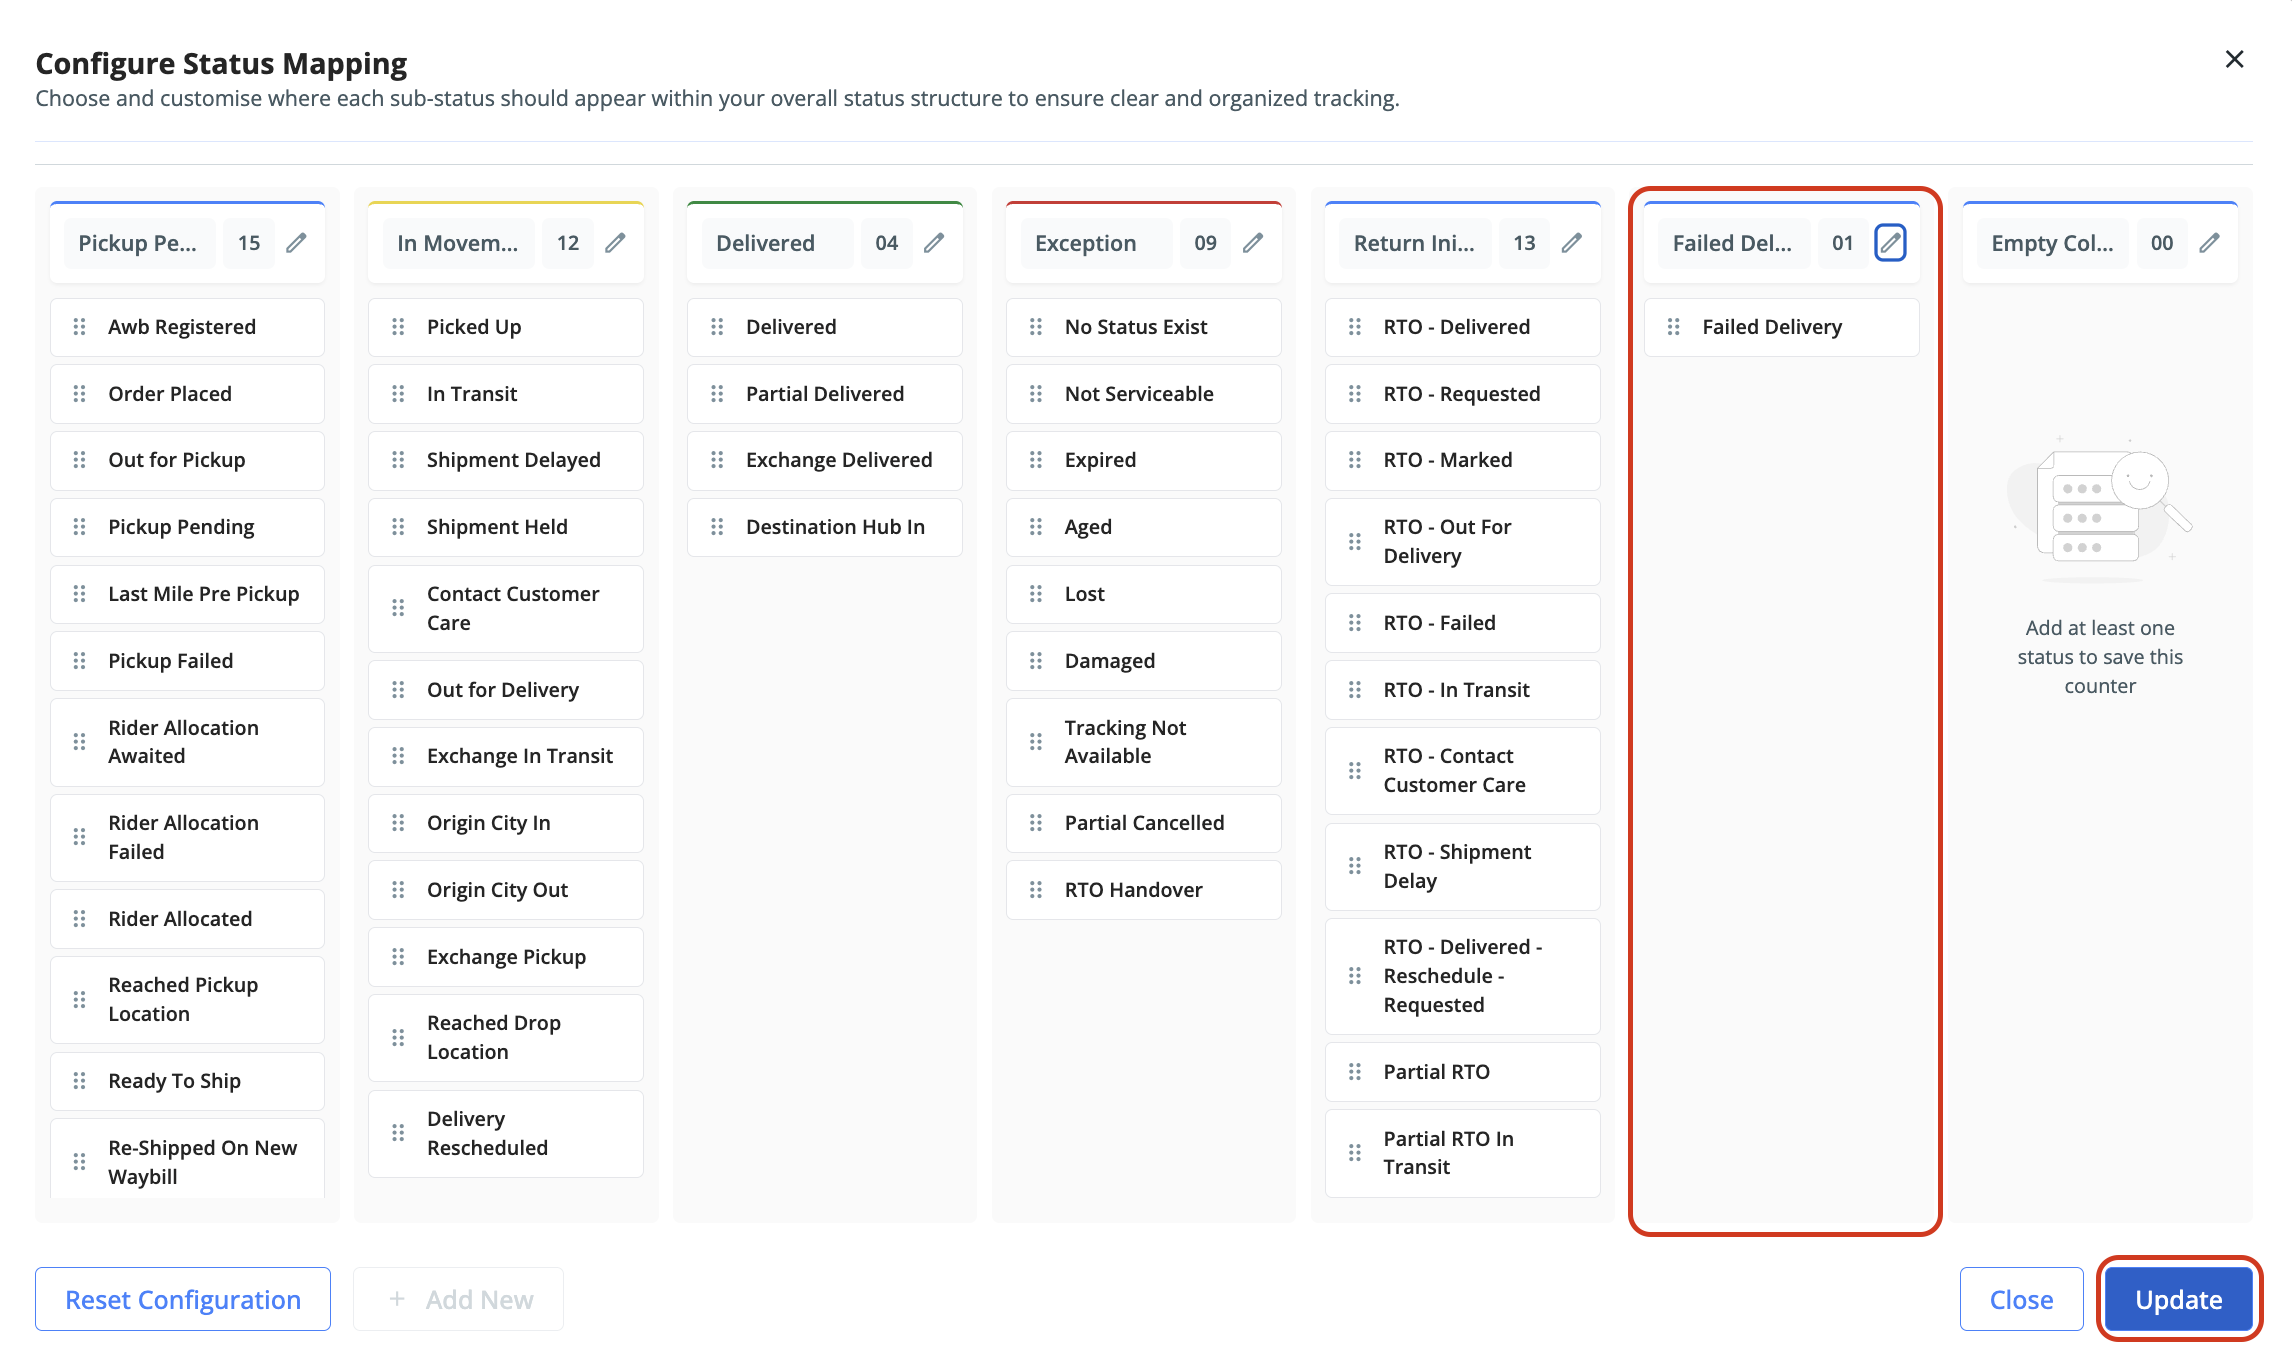
Adding a New Counter
Click on “Add New”.
Enter the name of the new counter.
Drag and drop the statuses you want to associate with it.
Click Update to save your configuration.
Important Notes:
Each new counter must have at least one status mapped to it before saving.
You can currently add up to two additional counters beyond the default set.
Post Configuration
Once updated, the counts and data in each counter will refresh automatically based on the new mappings.

Click on any counter to view the list of AWBs that fall under it.

To download reports for specific counters, go to Actions → Generate Report.
Access Control
By default, only Admin users have permission to edit status counters.
Admins can extend this access to specific users by navigating to:
Profile → Manage Sub Users → Edit Access Permissions → Track → Enable “Track Orders Bucket Configuration”.


Was this article helpful?
That’s Great!
Thank you for your feedback
Sorry! We couldn't be helpful
Thank you for your feedback
Feedback sent
We appreciate your effort and will try to fix the article