You can configure different SLAs for each courier partner account based on the account settings. To upload SLAs, follow the path:
Settings → Carrier → Carrier Integrations → View Details (for the chosen courier) → Select Account Code → Upload SLA
Once you open the SLA upload page, you will see three upload options:
Single Warehouse
Marketplace
Zone-to-Zone SLA Upload

Below are detailed steps for each method.
1. Single Warehouse SLA Upload
Use this method if you have a single warehouse or a limited number of warehouses where SLAs need to be configured. This allows you to upload SLAs for one pickup pincode at a time.
Steps:
From the Pickup Warehouse (Pincode) dropdown, check if your warehouse is already added.
If not, click Add Pickup Warehouse, enter the pickup name and pincode, and submit.
Once added, select the warehouse from the dropdown.
Download the sample file, fill in the SLA details, and save it as a CSV file.
Upload the completed file.
After a successful upload, you can download the SLAs from the Download Uploaded SLA option.

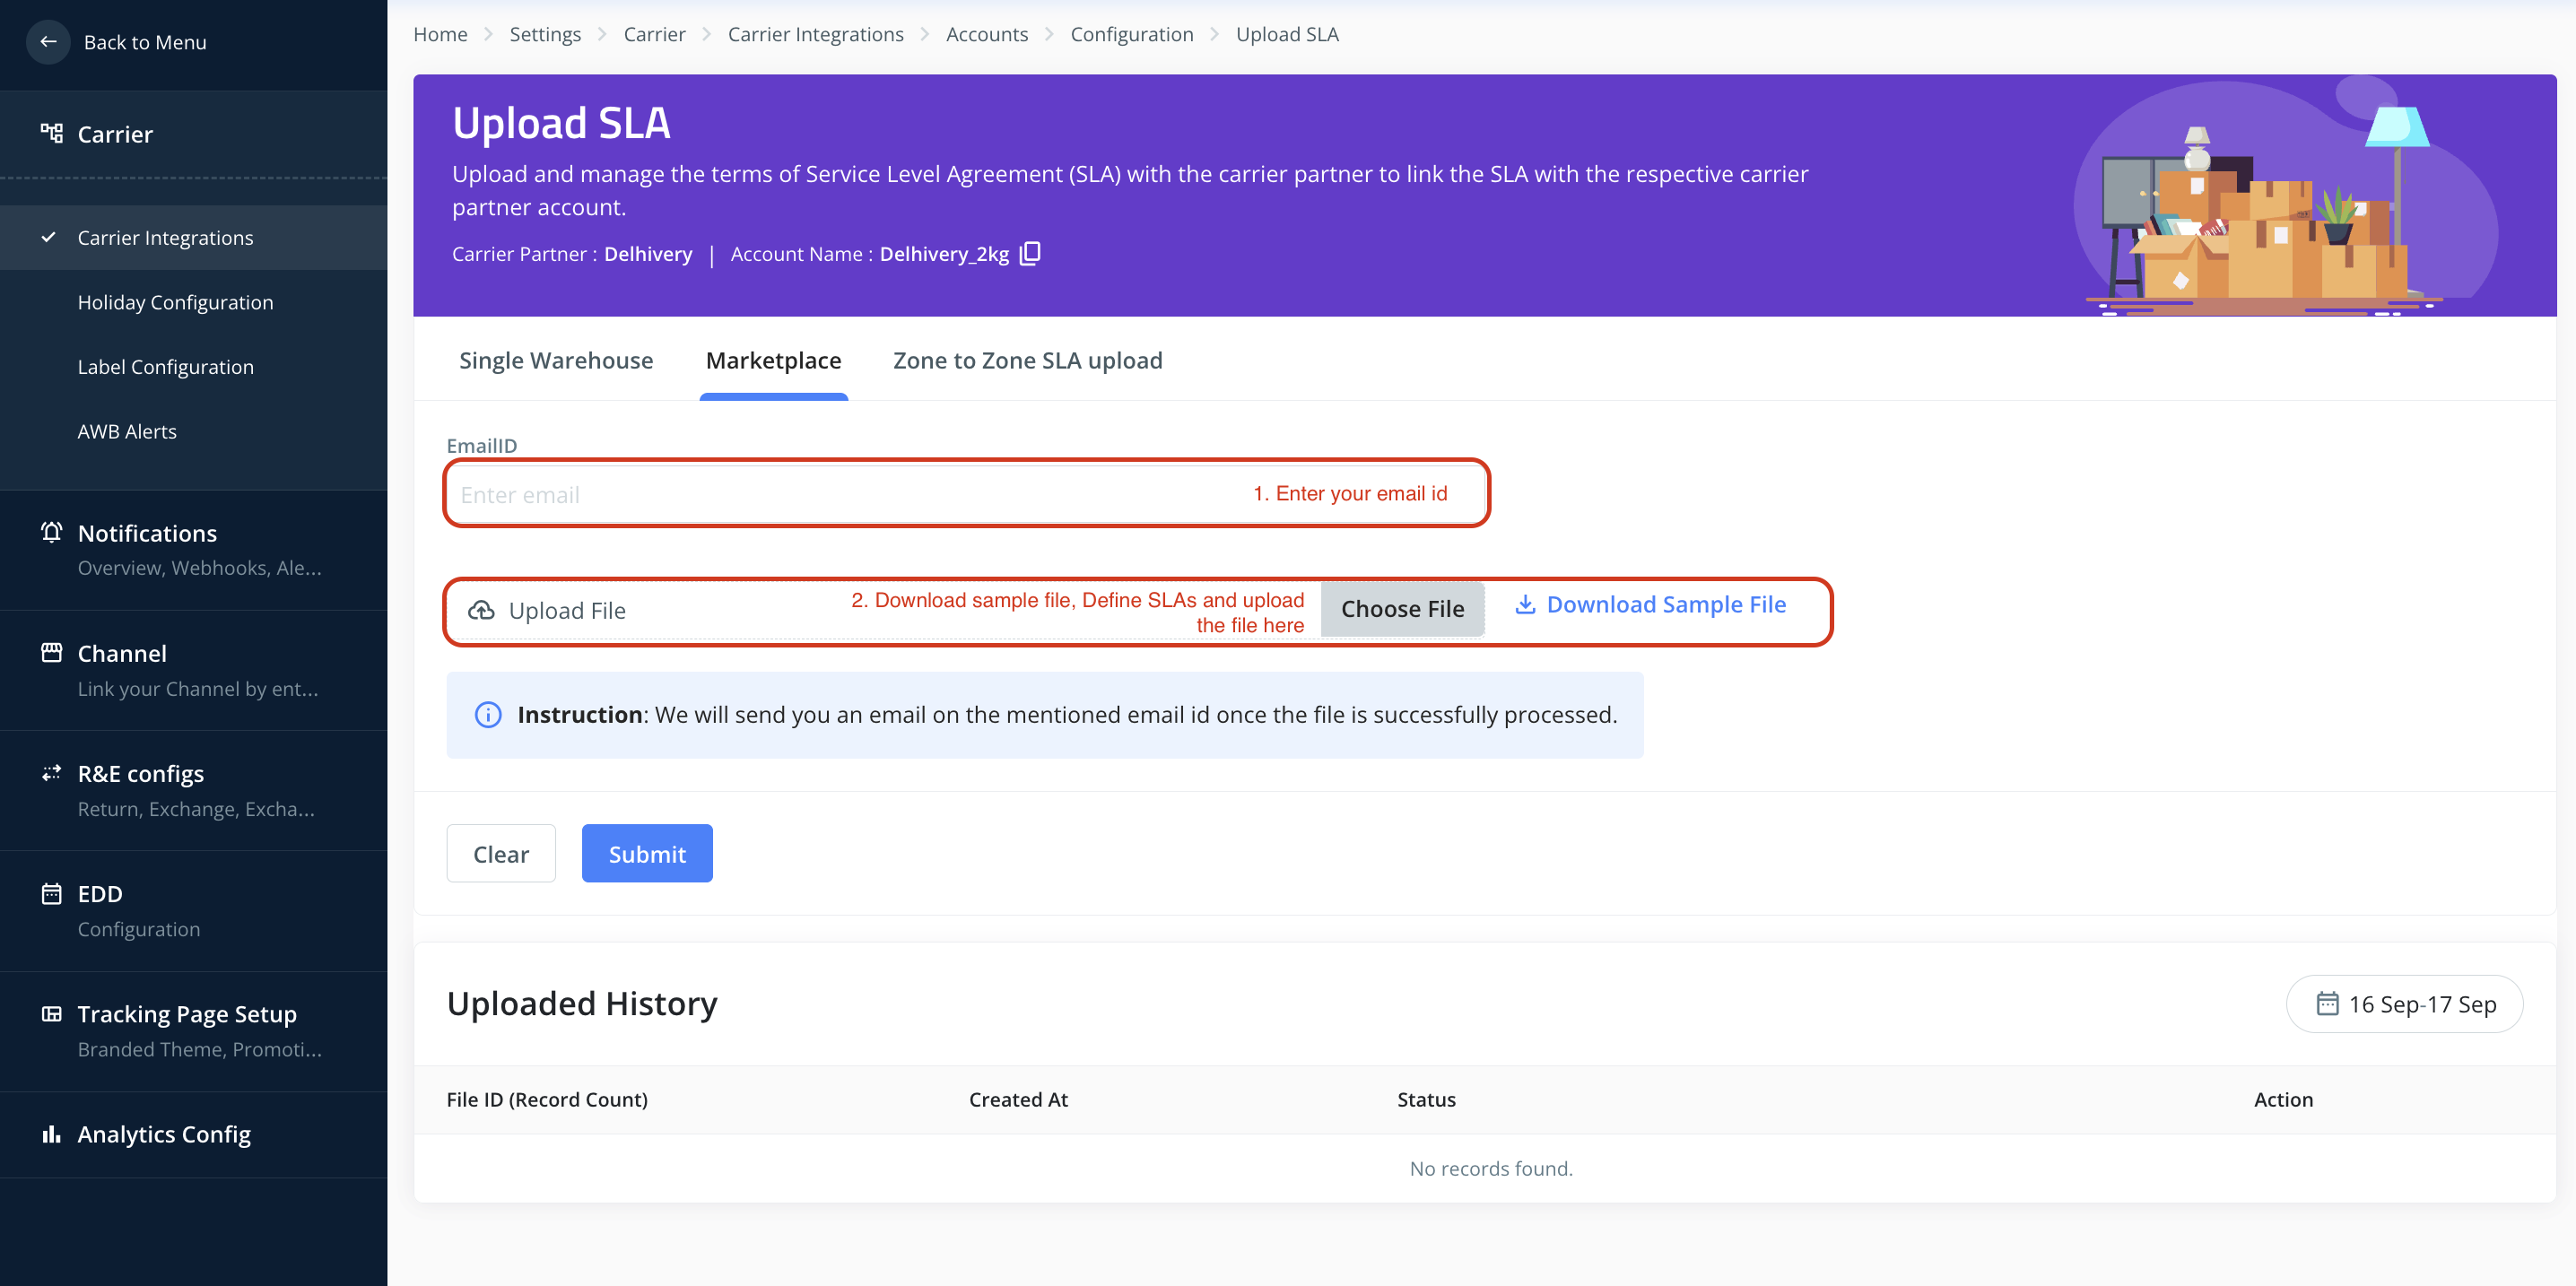
2. Marketplace SLA Upload
If you have multiple warehouses with SLAs defined for pickup and drop locations, uploading them individually can be tedious. The Marketplace SLA option allows you to upload SLAs for multiple locations in bulk using a single file.
Steps:
Download the sample file.
Add SLA details for each pickup–drop pincode combination.
Save the file as CSV.
Enter your email ID in the provided field. (This is required as bulk uploads may take 5–10 minutes. You will be notified by email once the upload is complete.)
Upload the file and click Submit.
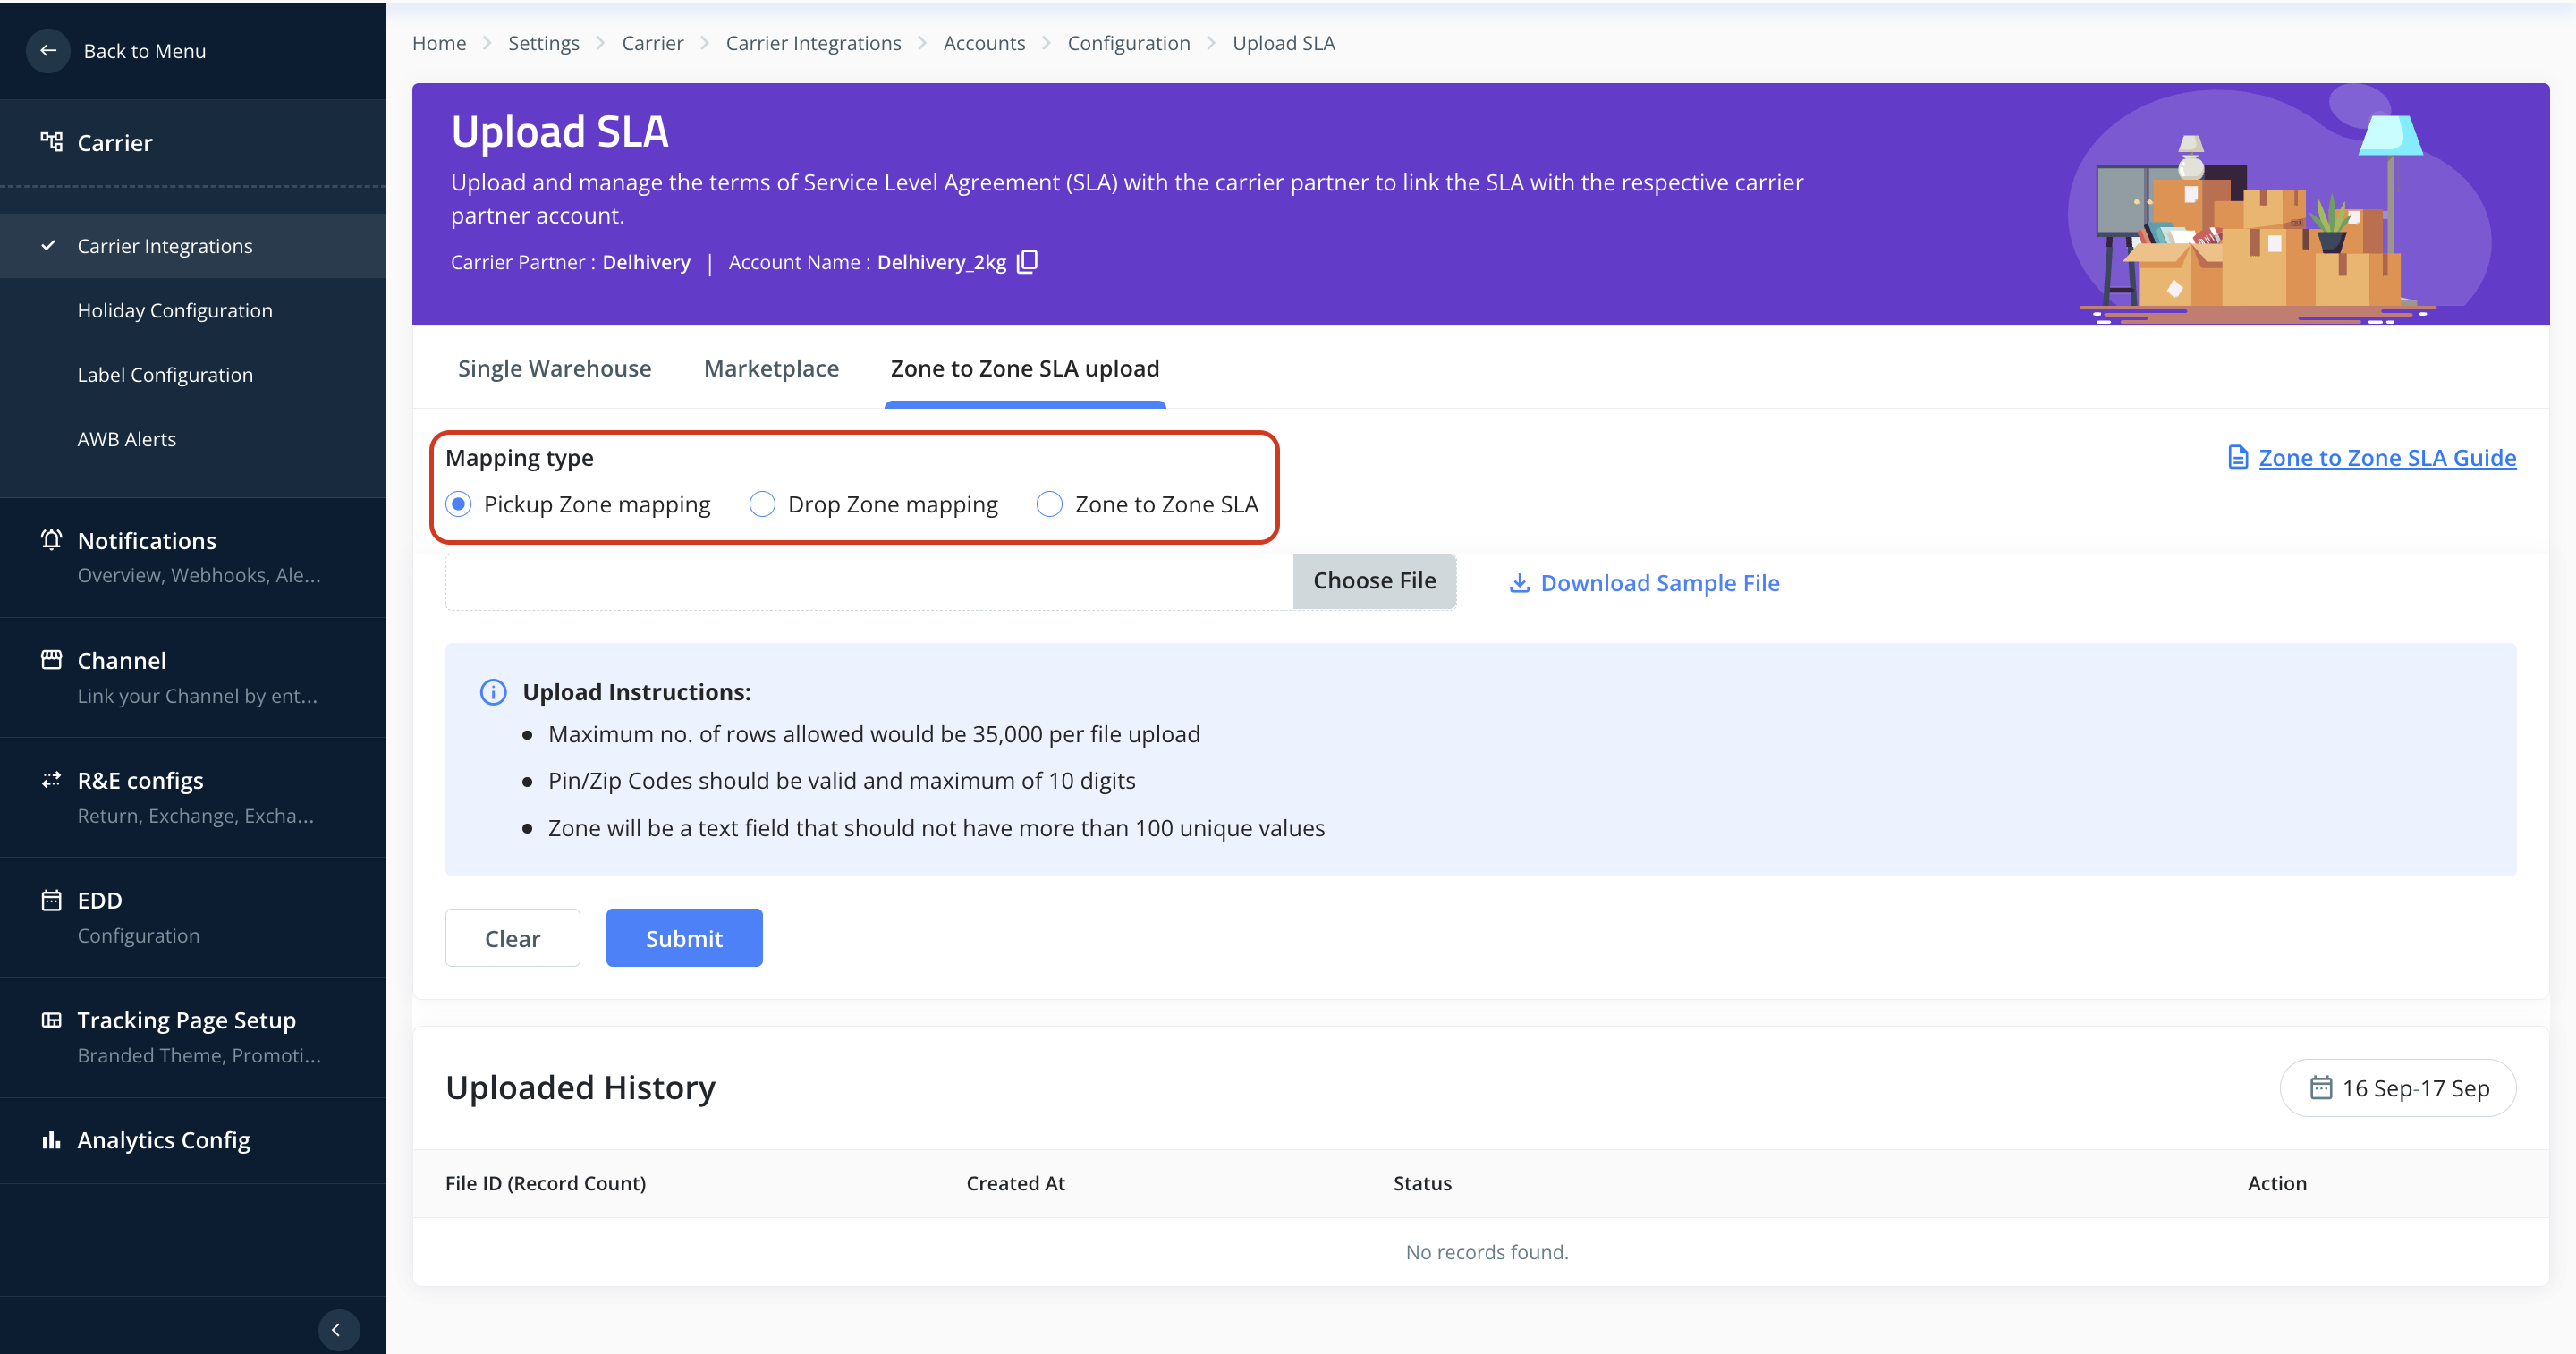
3. Zone-to-Zone SLA Upload
If your SLAs are defined based on zones (e.g., Zone A → Zone B), you can use this method. It requires mapping pincodes to zones first, then defining SLAs between those zones.
Steps:
Map Pickup Pincodes to Zones – Assign pickup pincodes to their respective zones.
Map Drop Pincodes to Zones – Assign drop pincodes to zones.
Upload Zone-to-Zone SLA File – Based on the above mappings, upload the SLA file that defines SLAs from one zone to another.
By choosing the method that best fits your setup, you can efficiently upload SLAs for your courier partner accounts.
Was this article helpful?
That’s Great!
Thank you for your feedback
Sorry! We couldn't be helpful
Thank you for your feedback
Feedback sent
We appreciate your effort and will try to fix the article