Please click on the below link to install the EDD APP on your Shopify account.

Steps to complete on Shopify:
1. Install the EDD App using the following URL - https://apps.shopify.com/estimated-delivery-date-cp
2. Enter API credentials, pickup warehouse pincode, standard O2S time, and cutoff time so that EDD and serviceability APIs can be called. Easyecom Email, password, API key, and location API Key[master/ primary location].
3. You can reach out to your Easyecom POC to get the above Easyecom-specific details. Or, you can start a separate email with your Easyecom POC looping onboarding@clickpost.in.

4. If you have multiple warehouses added in Shopify, we've introduced a checkbox to enable multi-FC logic (see screenshot in point 3). This feature will include all locations added to your Shopify store, filter for those with available inventory for the relevant product, and display the minimum EDD across all applicable FCs to the user.
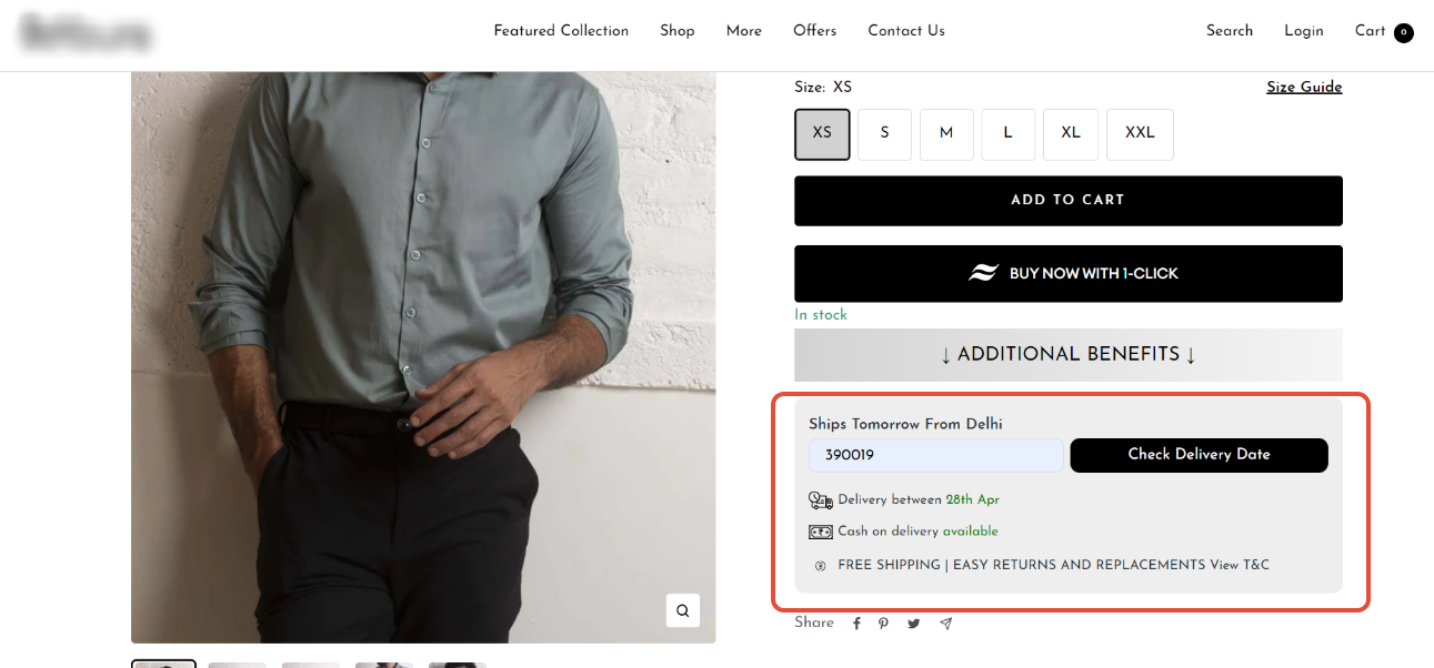
5. Once the end customer enters the drop Pincode on Shopify. The request will be passed to Easyecom and it will check if the inventory is available at the nearest location or not. If the inventory is unavailable, Easyecom will check the inventory availability at another nearest location. Once the nearest pickup location is determined, the ClickPost system will calculate the EDD based on the SLA uploaded, and a response will be provided which will display to the end customers on Shopify.
6. Clickpost passes SKU + drop location via Easyecom API. Easyecom returns the EDD which is then displayed on Shopify.
7. You can add product/collection/vendor config to add buffers in EDD SKU-wise or collection-wise. All configs are added up before serving to the customer.

8. Go to “Sales channel” >>”Online Stores”>>”Themes”>>”Customize” to add EDD block on Shopify

9. You can customize look and feel, content etc of the widget with the config options.

Additional changes in design:
The below design is the standard design that we offer with our EDD app.

If you want to make any customization in the design then they can add HTML code in the Custom CSS option

Please find one sample design and code that you can add on your Shopify page
CSS/HTML Code
.clickpost-edd__container { padding: 15px; background-color: #f3f1ee; border-radius: 11px; } .clickpost-edd__submit-button { position: relative; margin-left: 7px; border-radius: 10px; width: 100%; } .clickpost-edd__drop_pincode-input { border-radius: 10px; } #response-success span { margin-top: 15px !important; }Steps on Clickpost dashboard
You need to upload SLA and serviceability for the courier partner accounts on Clickpost dashboard
Go to EDD section in the settings and enable EDD service
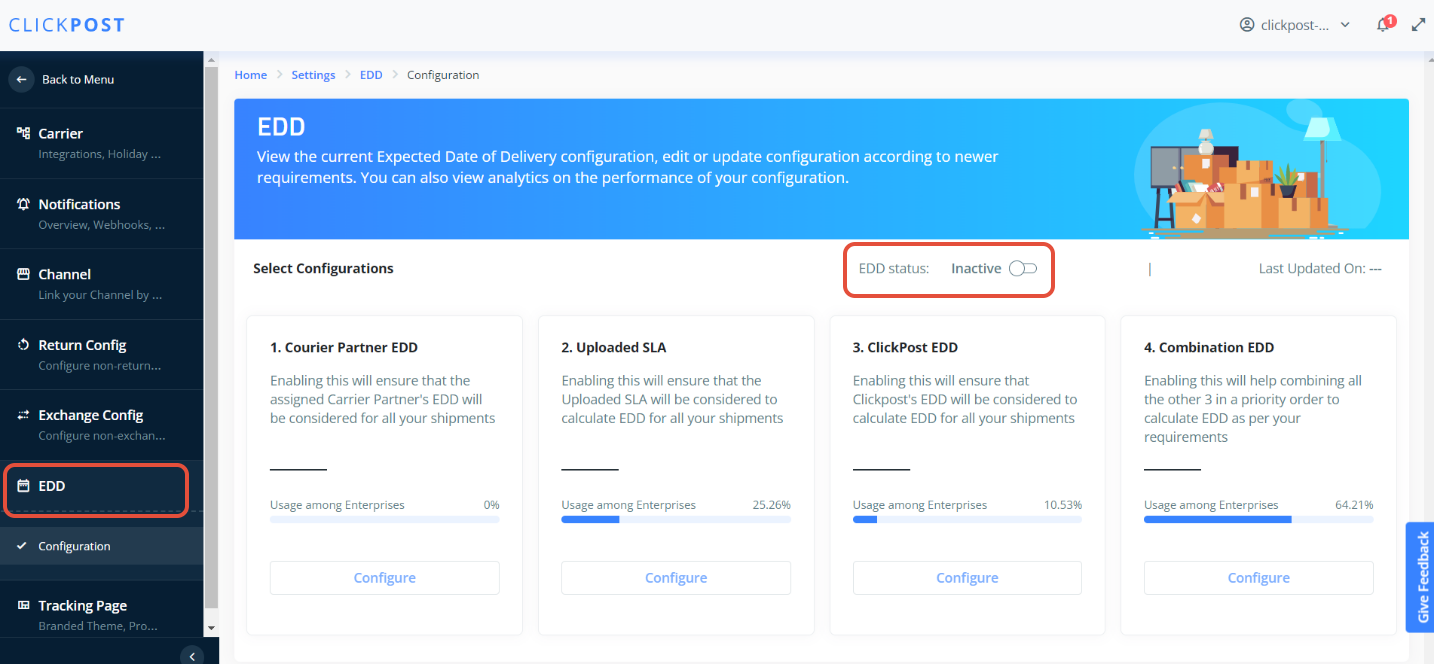
Post which click on “configure” to set the priority for EDD calculation
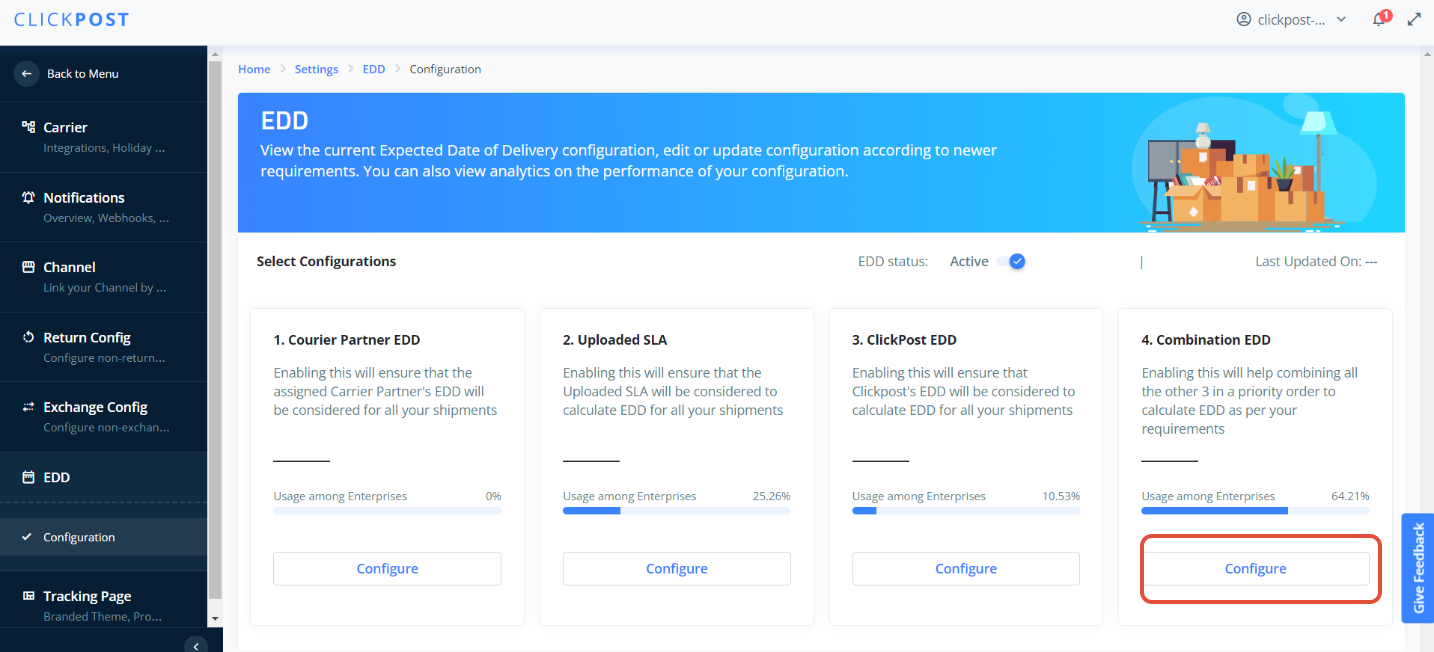
Drag & Drop to set the priority

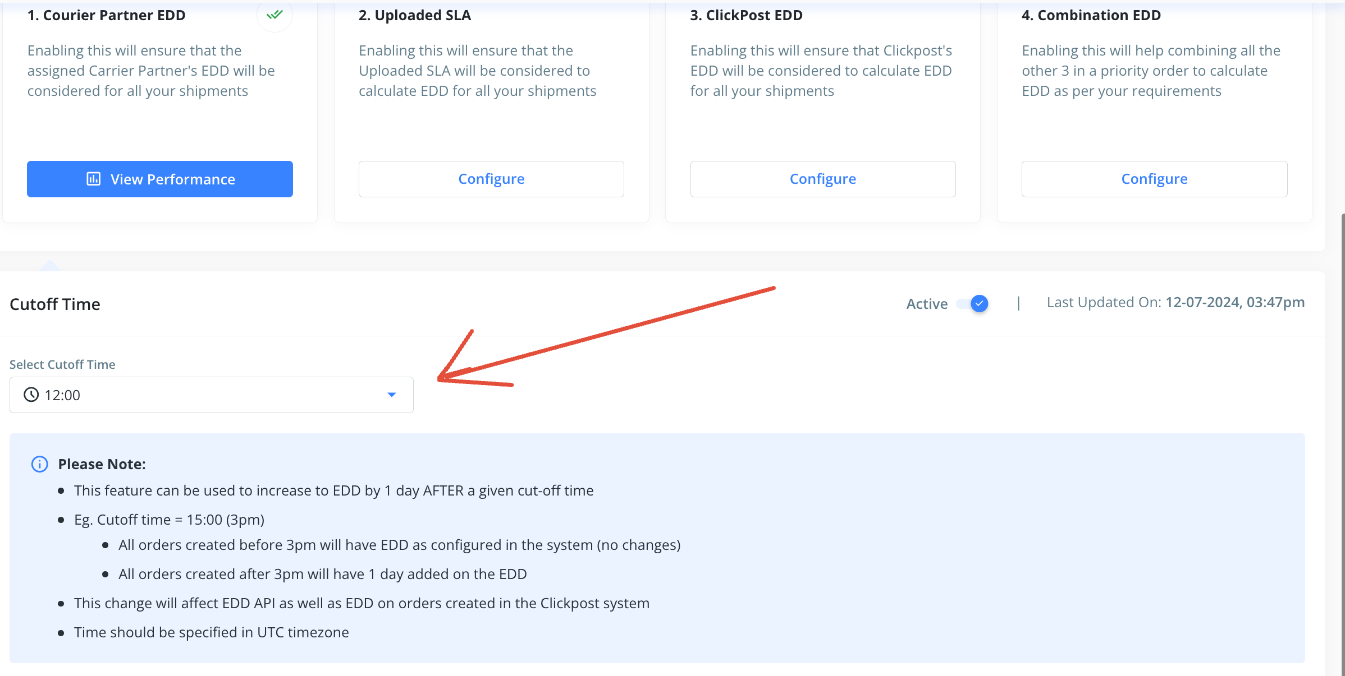
Please note, if you have already set the Cut Off time during configuration on the Shopify EDD App, kindly avoid configuring the cut-off time again in the EDD section on the dashboard. Otherwise, two cut-off times will be applied, and a delayed EDD will be displayed to the end customers.
Click on Submit to complete the setup for EDD.
Was this article helpful?
That’s Great!
Thank you for your feedback
Sorry! We couldn't be helpful
Thank you for your feedback
Feedback sent
We appreciate your effort and will try to fix the article
