What is Appointment Based Delivery
In appointment-based delivery models, brands are required to schedule delivery slots with marketplaces such as Blinkit, Zepto, and others. These marketplaces operate on a time-slot system, where sellers must secure a specific date and time interval to deliver their goods. This process ensures smooth coordination, optimized warehouse operations, and timely order fulfillment.
Use Case:
In an appointment-based delivery model, a brand supplying goods must schedule a specific date and time slot with marketplaces like Blinkit or Zepto before dispatching inventory. This is essential as these platforms have limited warehouse space and operate on strict time-bound logistics to manage high volumes efficiently. By booking a delivery appointment through the marketplace’s vendor portal, the brand ensures that its shipment is received smoothly, avoids delays or rejections, and enables faster inventory processing and product availability on the platform.
Setting Up Appointment Delivery Communications on ClickPost:
Step 1: Add the courier POC email IDs to whom the appointment reminders via emails has to be triggered by following the steps below.
Login to dashboard-> in the left hamburger menu go to settings-> carrier integrations-> select the carrier-> select the account-> click on appointment reminder-> add courier POC email IDs

Post adding the Email IDs, the automated reminders have to be setup. The steps of same are written below.
Go to Settings-> Notifications-> Add the email gateway-> set up email template-> Make it live
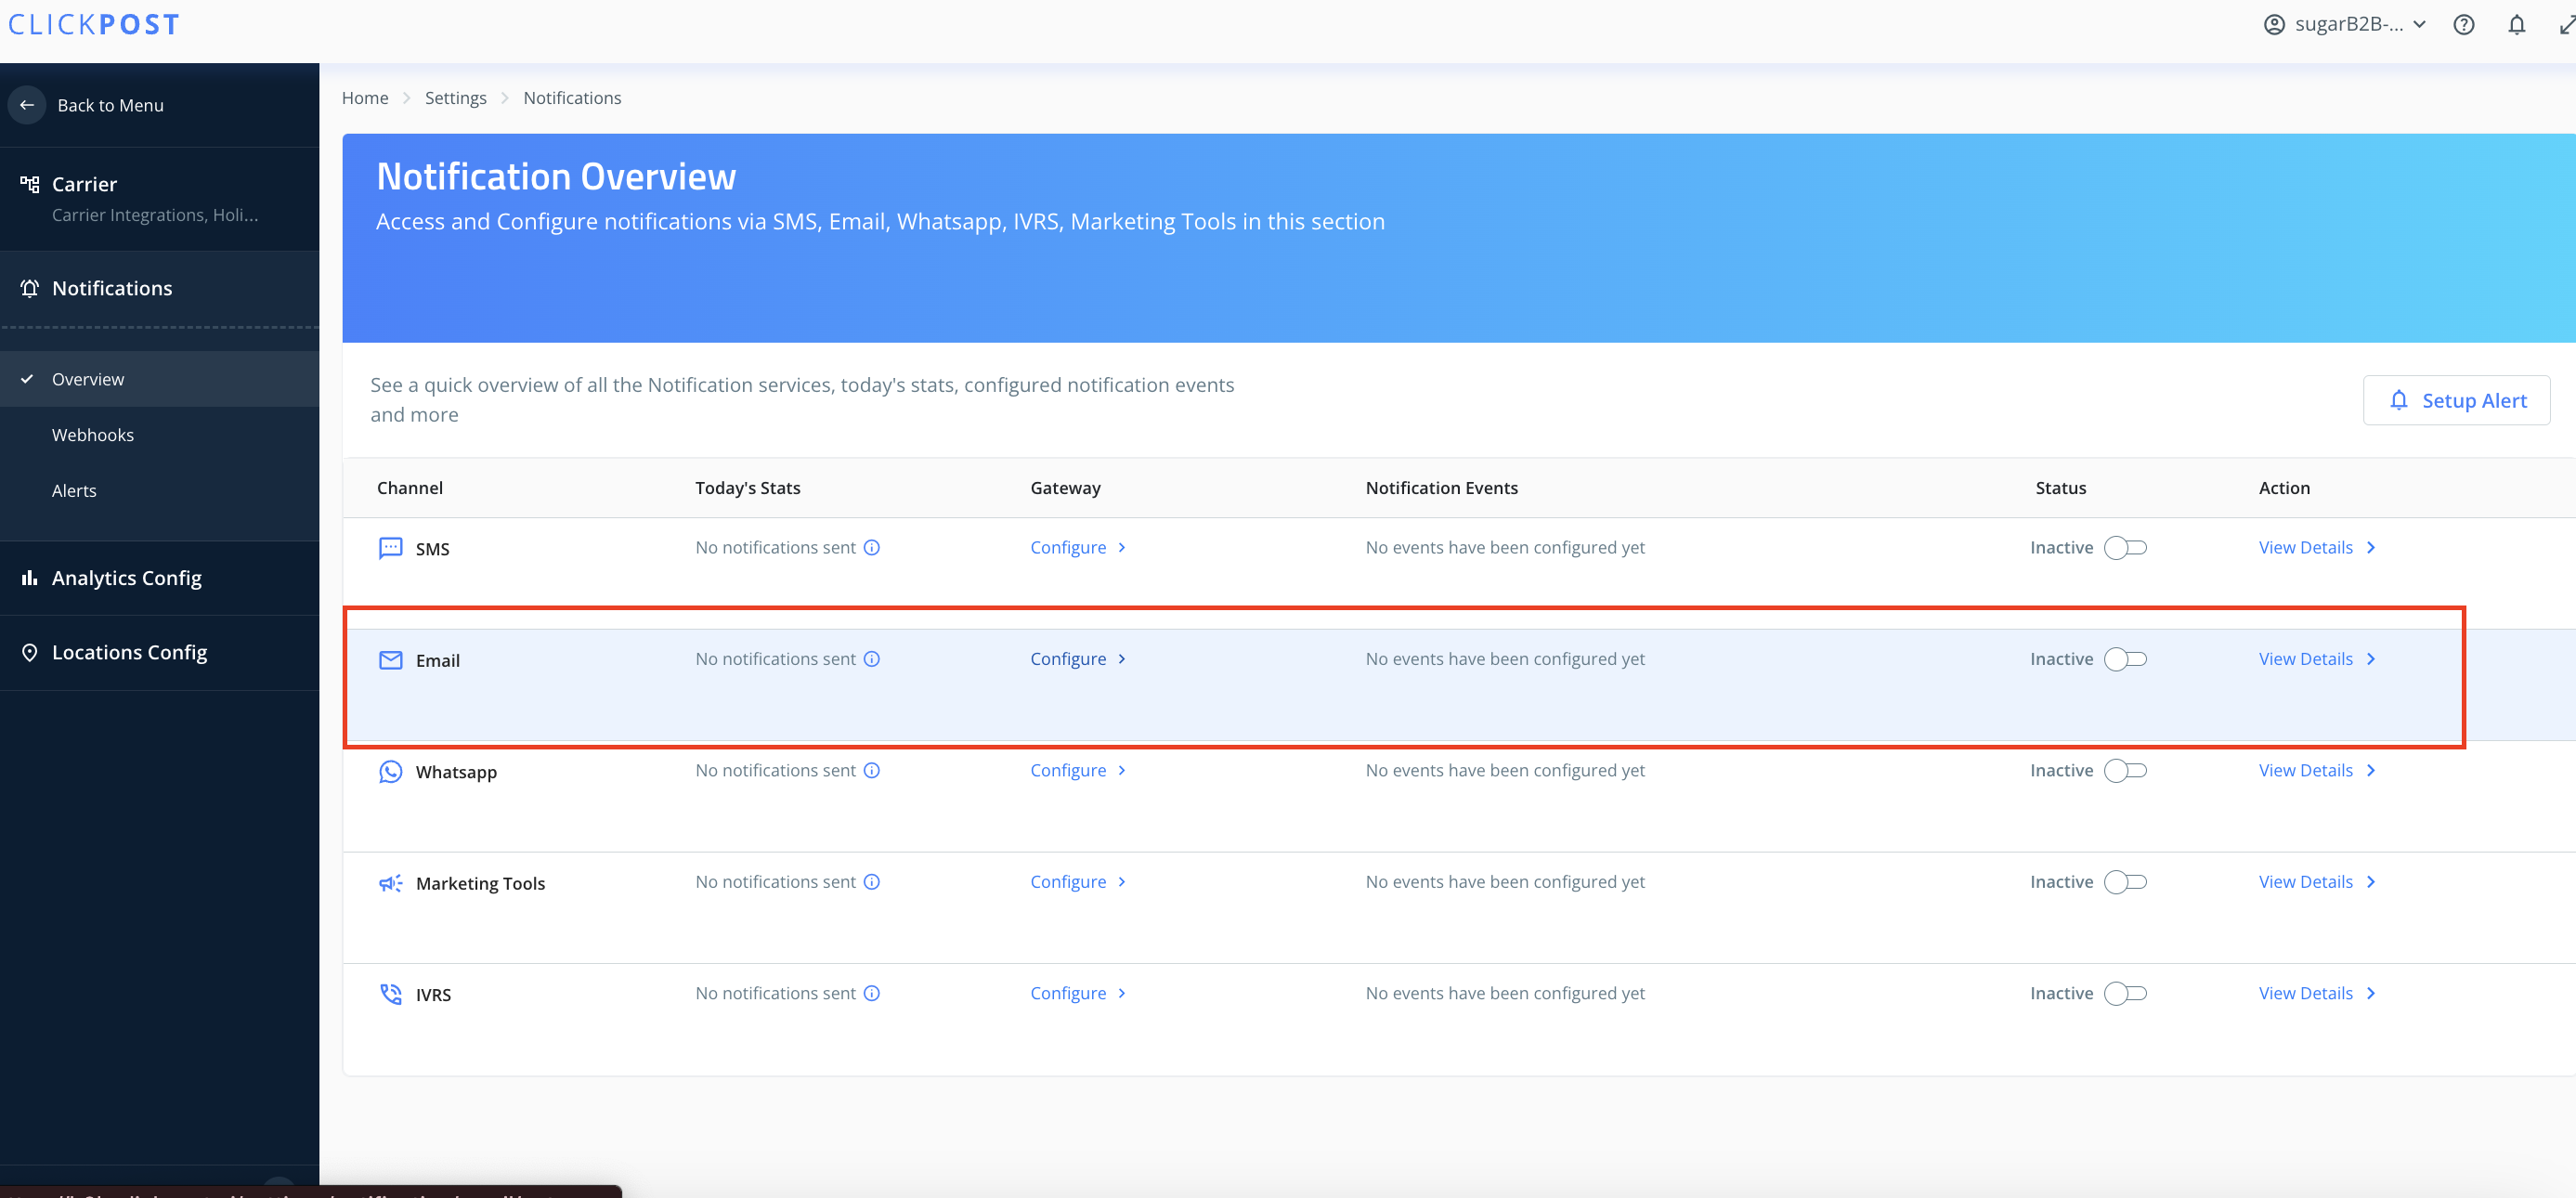
Post adding the email gateway, the email templates have to be added following the option shared in screenshot below.
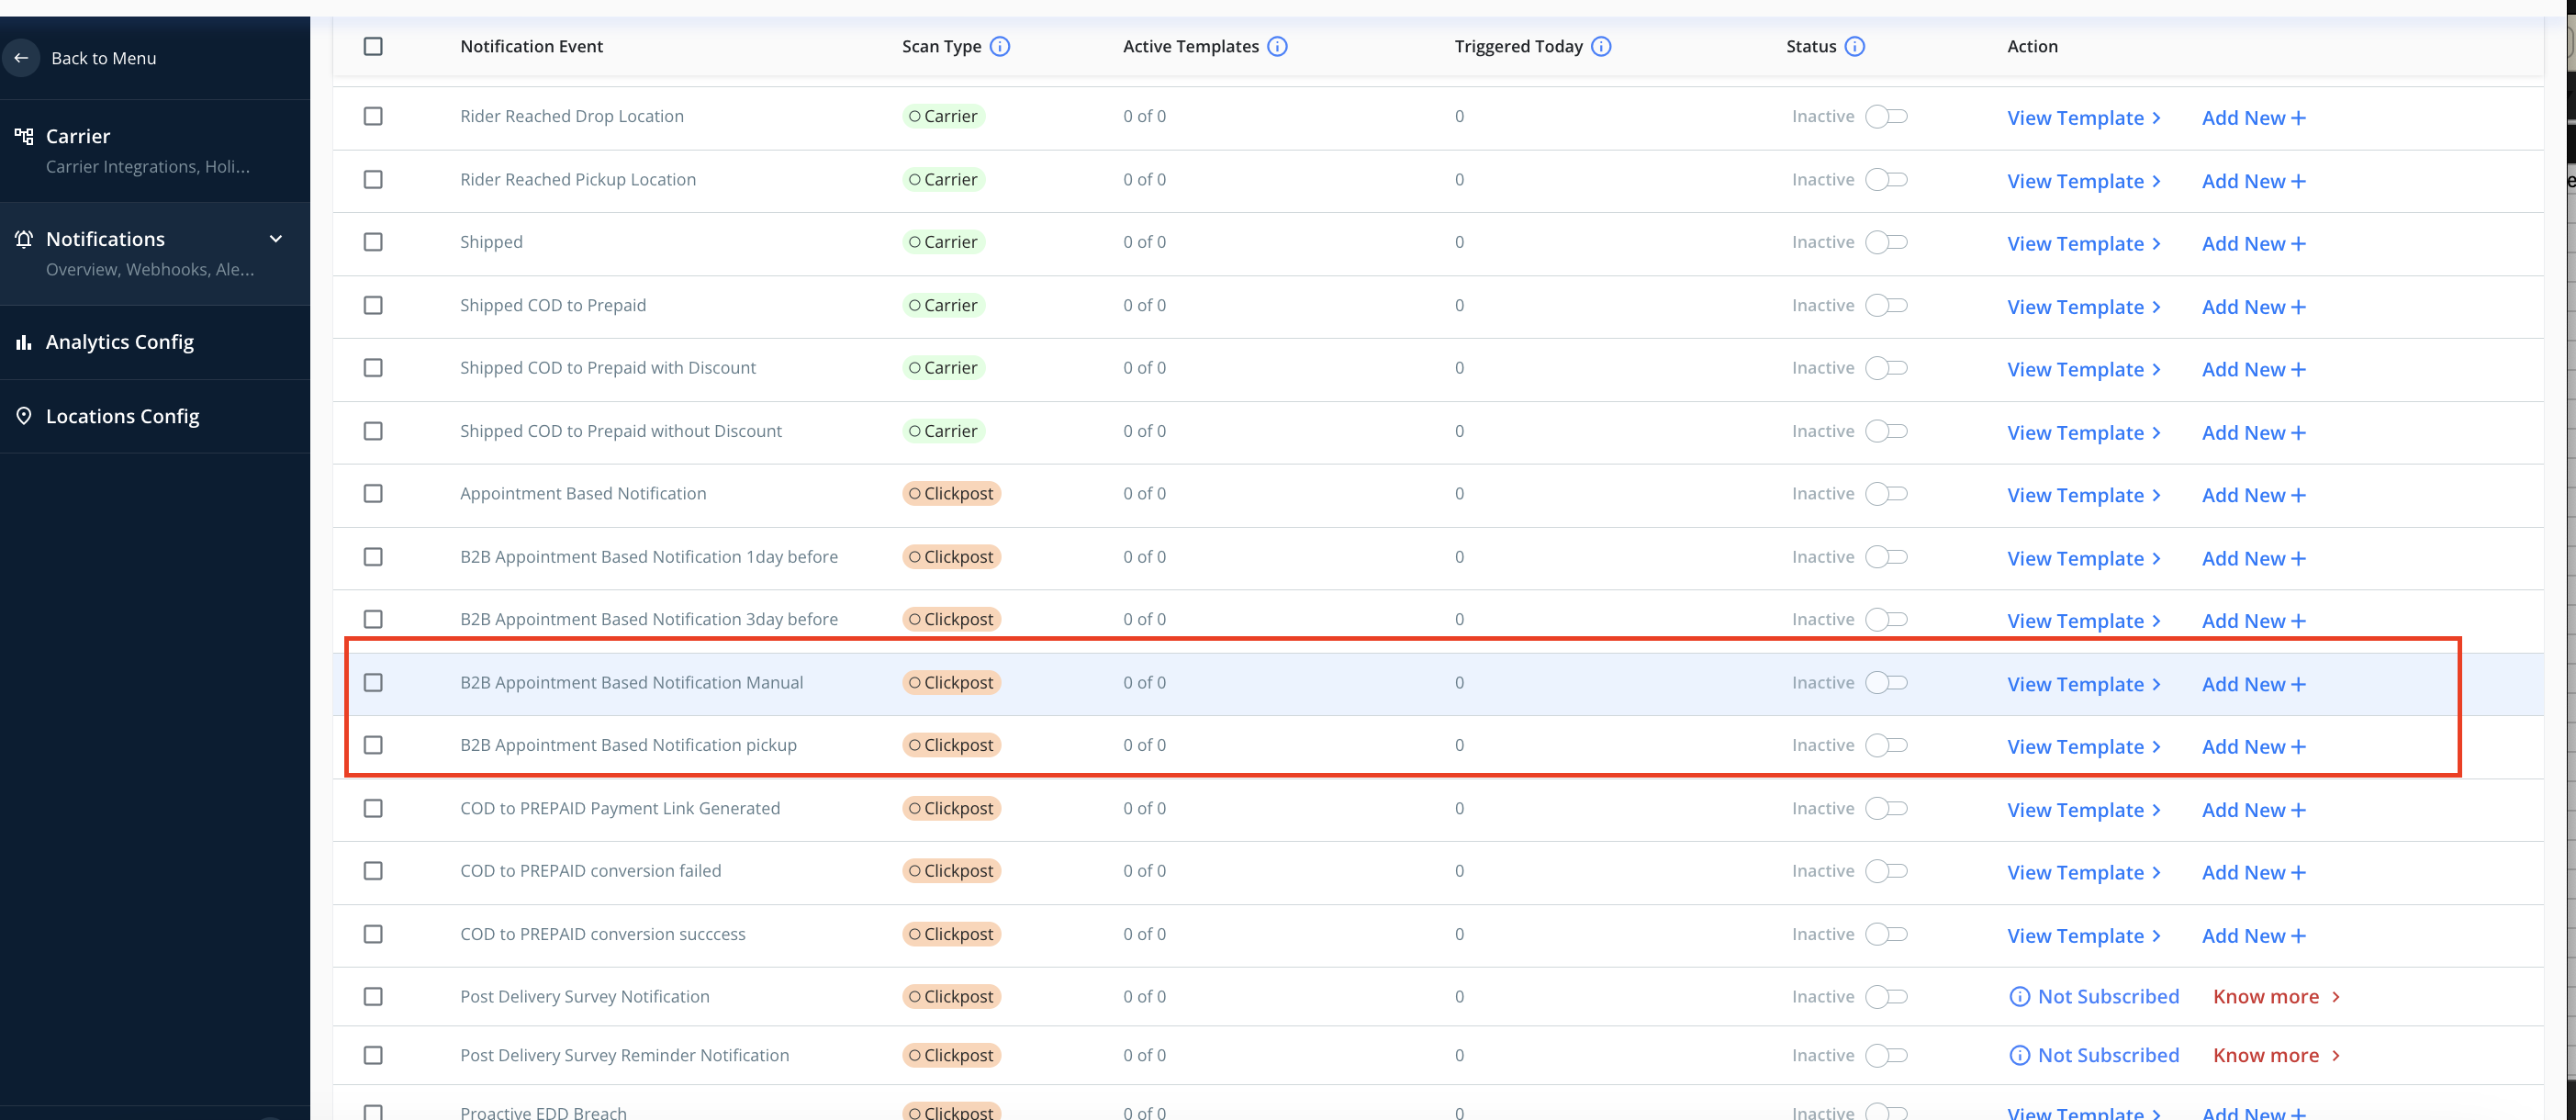
For automated communications that would be triggered to courier POCs would be automated and would trigger 3 days prior to appointment date and another one is one day prior to appointment date.
Setting up Appointment date and time for AWBs in ClickPost
Step 1: Login to dashboard
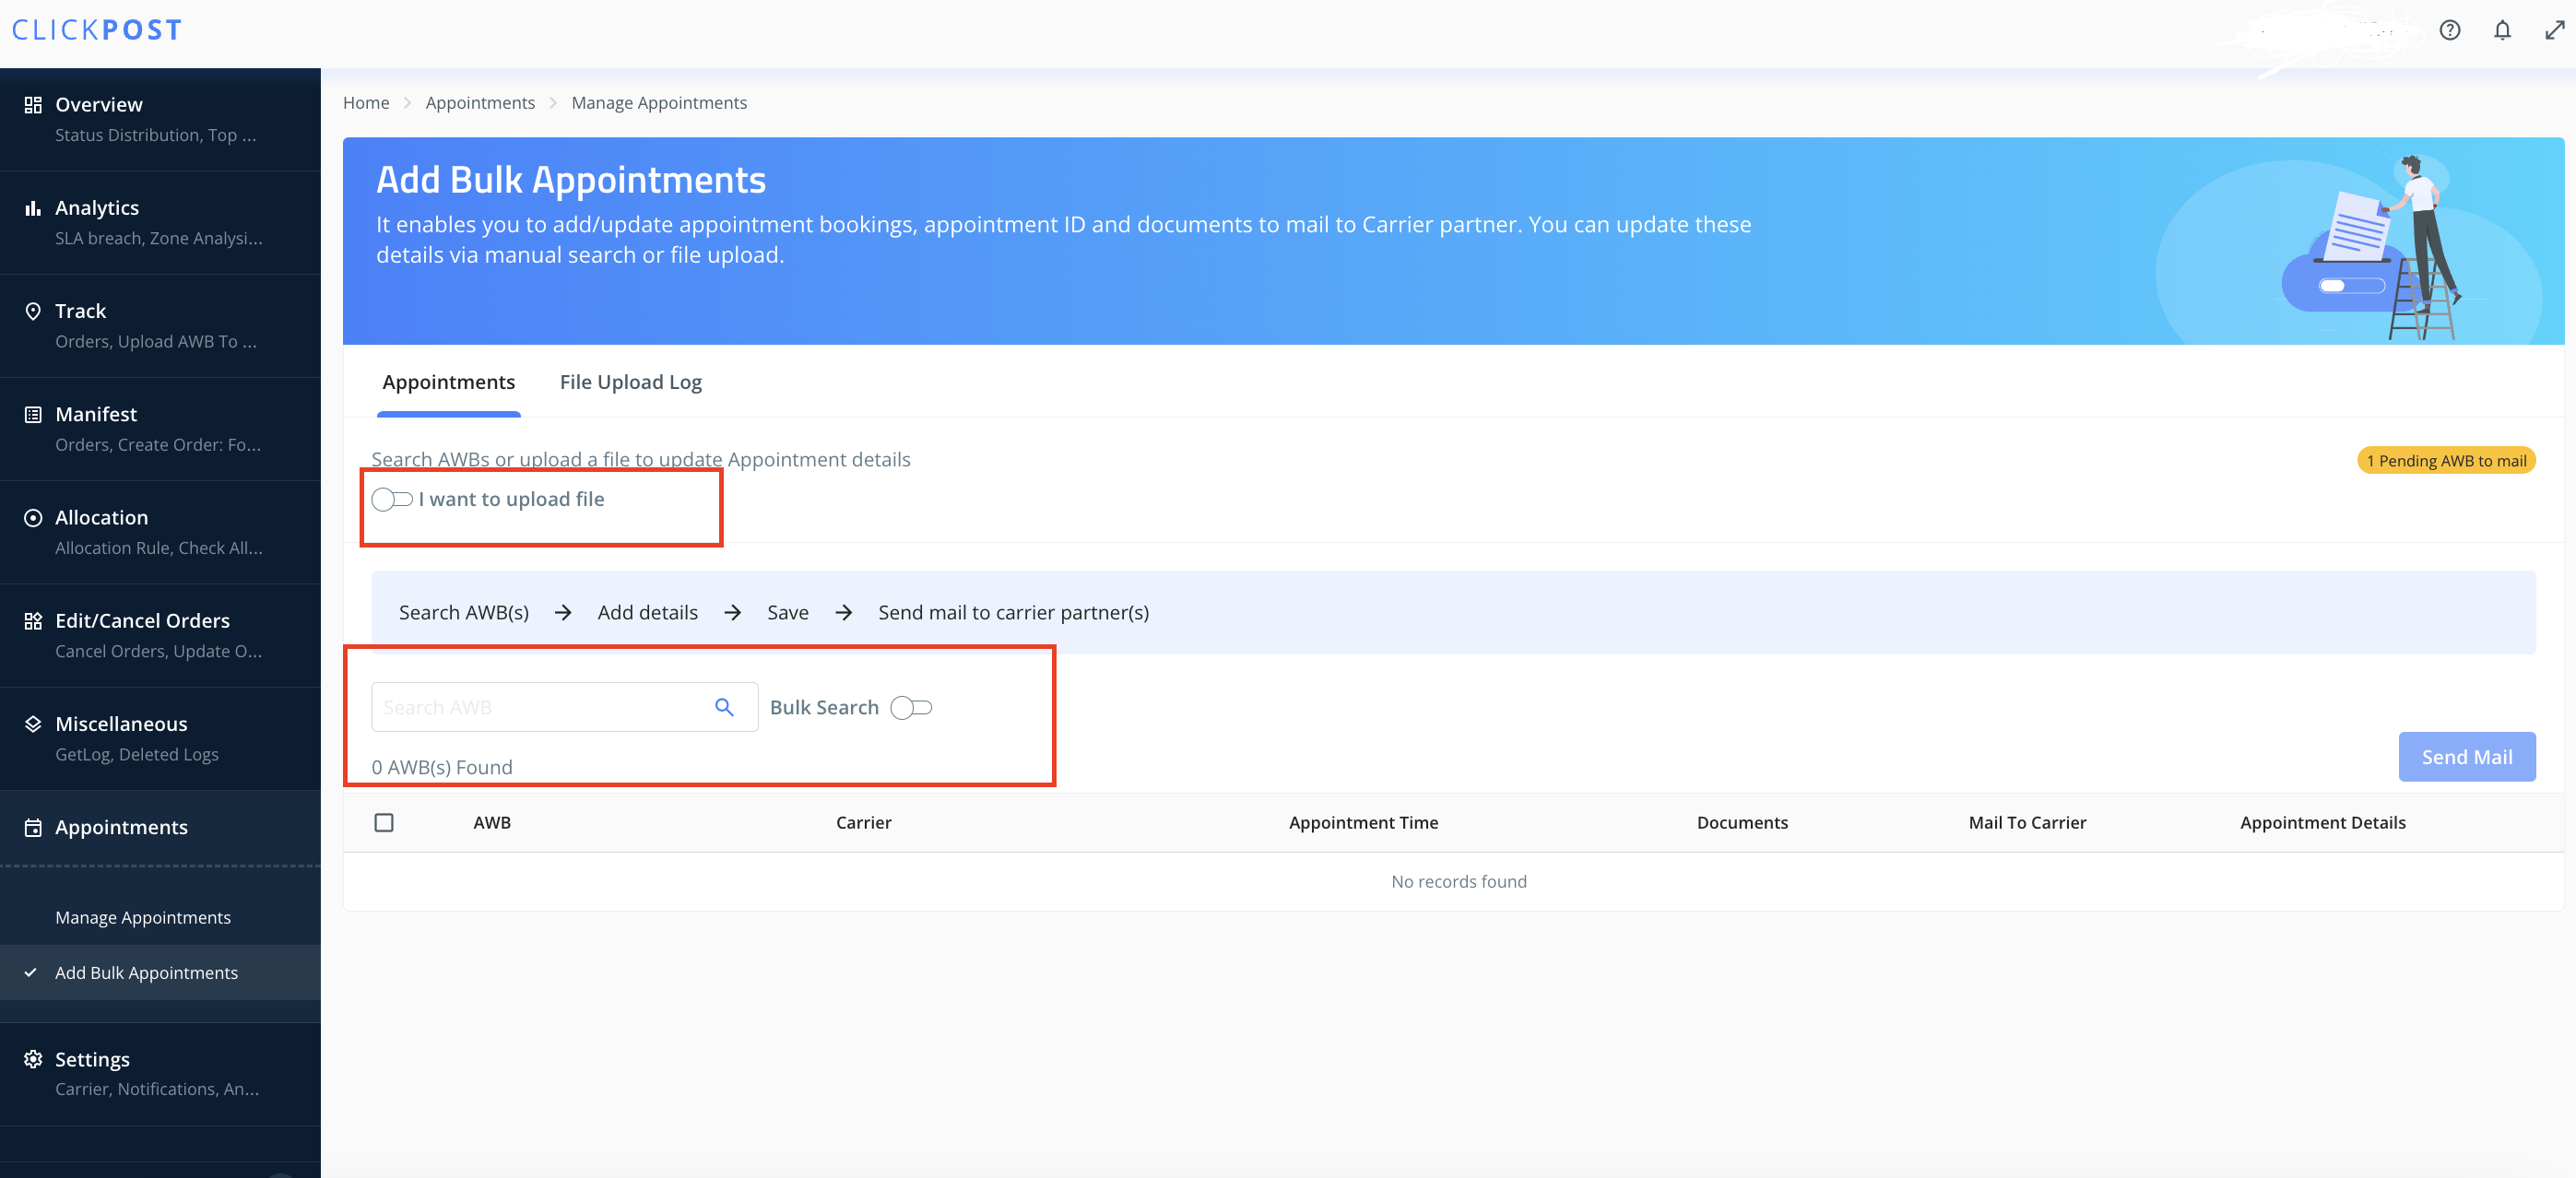
Step 2: Go to appointments tab in left menu-> Click on Add bulk Appointments
Step 3: There are two methods to add appointment(s). Either can be added one by one for each AWB or can use file upload method provided as shown in screenshot below.
To use file upload method, click on i want to upload file toggle
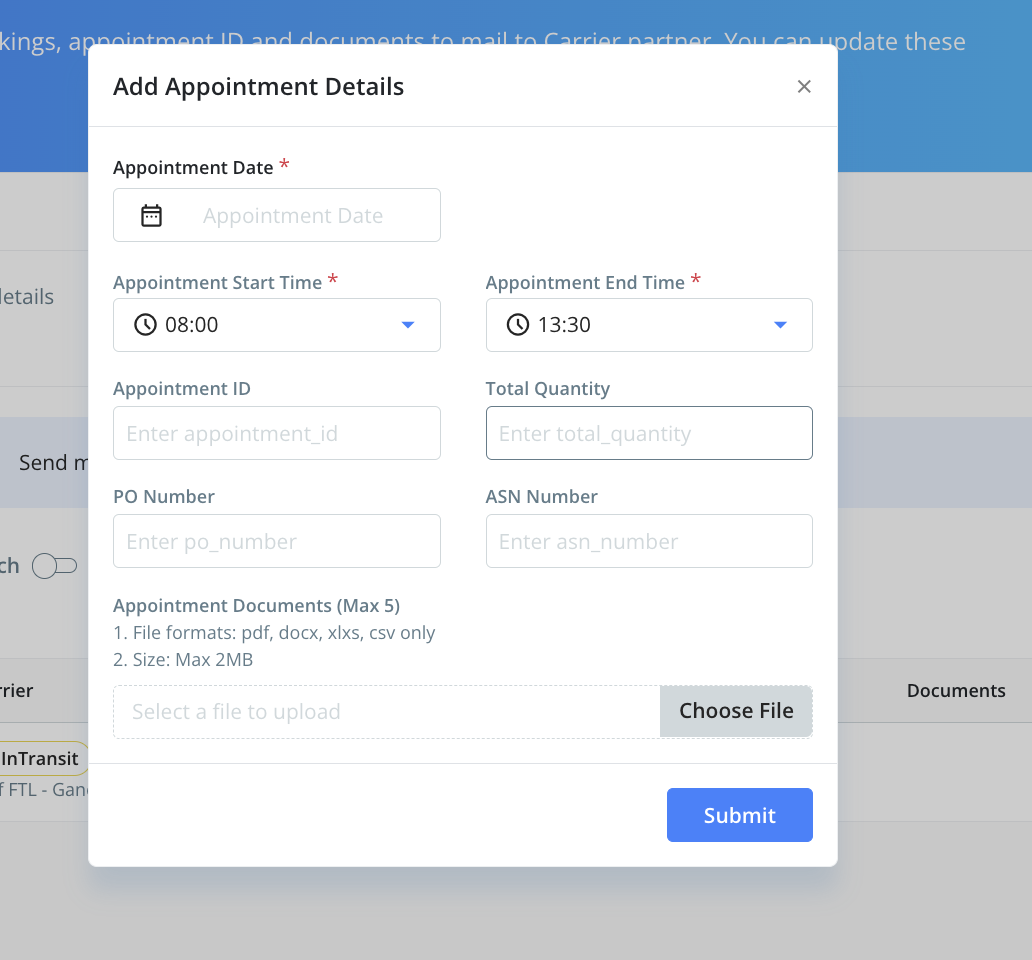
Step 4: Add the appointment details and submit the file or if using form click on submit then.
For using file upload method, download the sample file provided on dashboard and fill the same in expected format and upload it on dashboard.
Once the AWBs are added in ClickPost, the automated emails would be triggered accordingly to the milestones that have been activated in notifications.
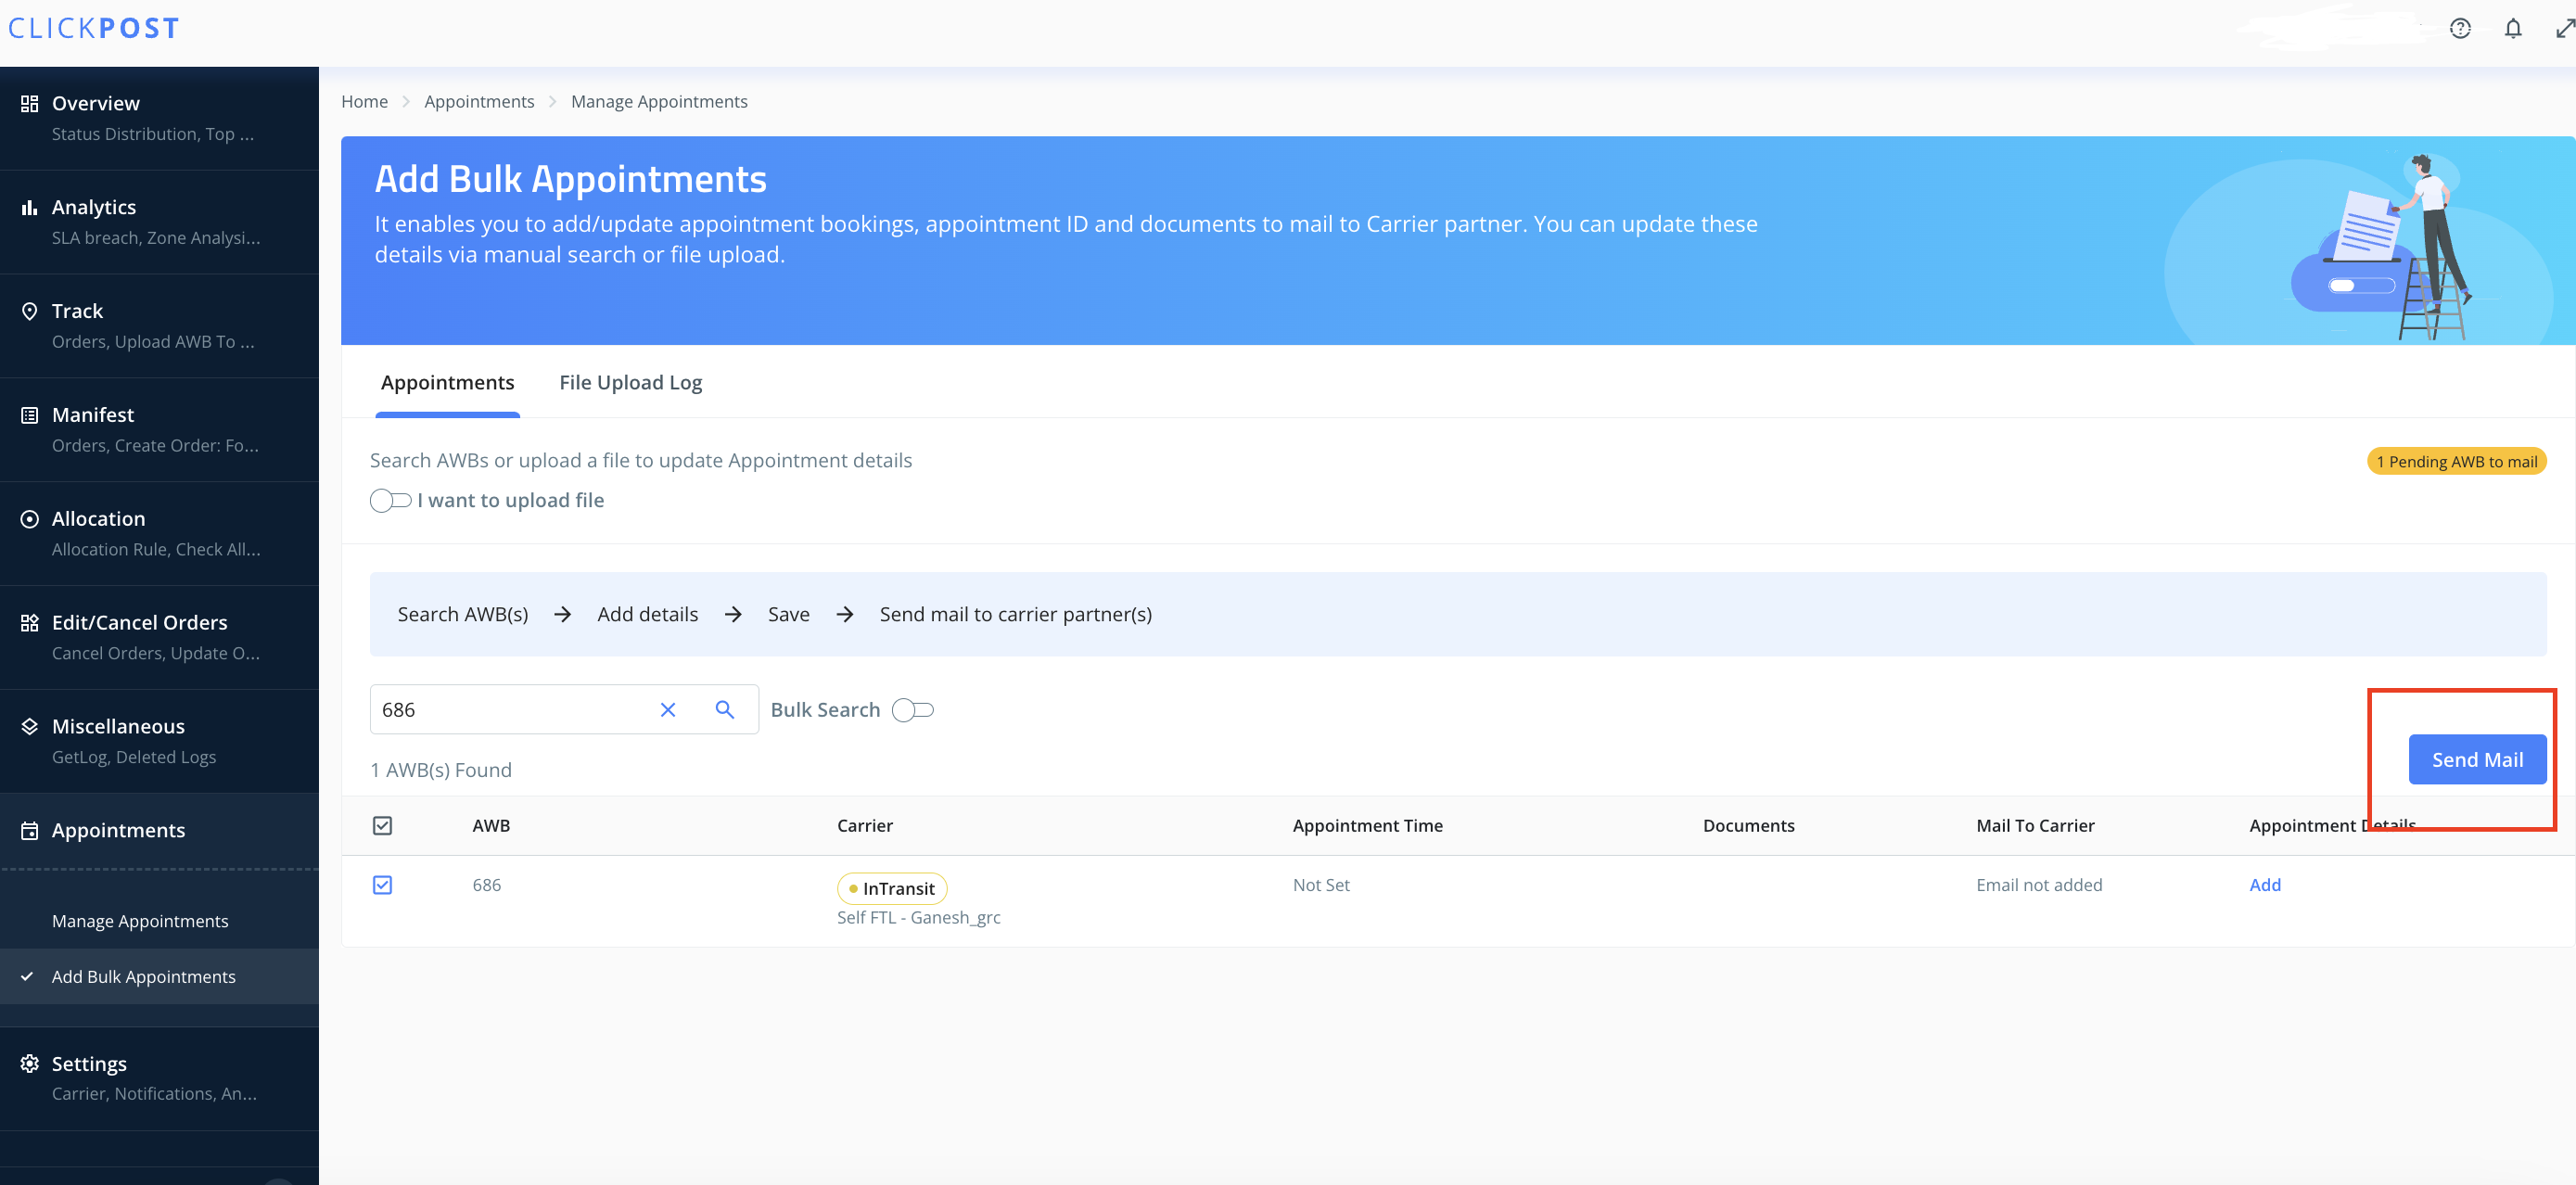
Moreover, If you wish to send the communications immediately select all those AWBs and click on send mail button as shown in screenshot below.
Editing/Updating the Appointment Details:
If you have added the details for appointment for any AWB(s)and you wish to update the same then go to appointment tab click on edit appointment and update the time slot and email communications will be triggered accordingly.

Checking the Appointment Data for Breaches and Adherence:
Go to appointments tab in hamburger menu-> go to Manage Appointments-> here you will see comprehensive view of all shipments with appointments and the one who may require appointments and can download report of same as well from the appointment dashboard
Was this article helpful?
That’s Great!
Thank you for your feedback
Sorry! We couldn't be helpful
Thank you for your feedback
Feedback sent
We appreciate your effort and will try to fix the article